Perhaps instead of fixing the shocks I could nab some off trademe.
http://www.trademe.co.nz/motors/moto...-444966119.htm
any thoughts?

 Hardcore Biker

Perhaps instead of fixing the shocks I could nab some off trademe.
http://www.trademe.co.nz/motors/moto...-444966119.htm
any thoughts?
Te audire no possum. Musa sapientum fixa est in aure.
NEDWN VIII

Great project ya got going there Dougie!
Jam and tarts....


If they fit, why not? They look much cooler than standardOriginally Posted by nathanwhite

Alloy, stainless and Ti polishing.
Bling your bike out!
PM me
Unknown Disorder

Your shocks are not rebuild able and if you get them to bits chances are they'll never go back together again. Not sure that I'd be spending money on the cheap ones off TM either, they are probably no better than the ones you have now.
Hardcore Biker
Don't bother with the balls in the steering head bearings - get some tapered roller bearinds and put new steering head bearings in. Be a big improvement.
New rear shocks (even cheapies) wil be a big improvement.
The forks can be rechromed, but that does cost money. A budget way until you can find replacements or rechroming is to rub down the rusty bits,and fill with epoxy, once dry snad off with very fine emery paper until the pits match the forks.
Be a good commuter once it is finished.
(\_/)
(O.o)
(> <) Peace through superior firepower...
Build your own dyno - PM me for the link of if you want to use it (bring beer)
Forum whore
Good effort Mate - will follow with interest.....
"If you haven't grown up by the time you turn 50, you don't have to!"
Hardcore Biker
erm.... right.
Well, I got the hundred dollar ones of trademe, ill try both of them when the bike is back together
Te audire no possum. Musa sapientum fixa est in aure.
Hardcore Biker
Alrighty! got some more work done today (I have plenty of free time atm because uni hasn't started I suspect it will be a different story in a week)
Issues with that fork notwithstanding I have decided to start rebuilding as much as I can whilst sorting out the fork, rather then focusing on it and driving myself insane. That said I do have a thought for it, a little more on that later
Greased up the lower half of the bottom steering head race
And then cleaned and installed the balls one at a time
(can you say, tedious, boys and girls?)
Anyway with that done I greased the top half of the race and installed the lower triple in.
Then realized that maybe it would be a good idea to install the top bearing before I screwed it down.
So grease
Balls
Installed
And cleaned up
Lower triple in
Onto the top triple!
The two screws that held the ignition in were done up so tight that after a full five minutes of trying I gave up and cleaned it with it still attached
Plonked it on the steering head and torqued it down to the recommended factory setting of "rather tight" by the highly accurate fingerometer
Checked that it couldnt move independantly of the lower triple but didnt affect steering movement and I was done.
Te audire no possum. Musa sapientum fixa est in aure.
Hardcore Biker
So my idea with the forks is to drill out this little doohickey that is holding all the other innards in
Right now conventional wisdom is screaming at me to rebuild the other fork and be done with it.
However I have a new set of fork seals on order and I dont want to have one fork with a new seal and oil (or just oil) and one old.
So if I can drill it out without (hopefully) damaging the other internal components then get a machinist to make up another one based on the one pictured from the other fork.
oh and my dad says he has some easy outs which we will try on the weekend
But then we drill!!
Te audire no possum. Musa sapientum fixa est in aure.
Hardcore Biker
Made some progress, infact, quite a lot of progress.
Cleaned and stuck on the swingarm
The frame design is a little irritating, one of the main engine bolts is also the swingarm bolt.
So thats going to have to come off again when the engine is going back in
Put the old shocks back in while i'm waiting for the new ones to arrive
And wouldn't you know it, the very next day!
Now they are a little longer, but thats not really an issue, what is however is the bottom connector.
To get it to fit i'm going to have to drill it oversize and there is not a lot of metal left on the bottom
But anyway, rear wheel and sprocket on
Finally managed to (partially) get the brake caliper open. Still not completely there but closeish
The bit pictured is apart that was just for dramatic purposes
Drilled out the fork cap thing which wasn't nearly as hard or long as I thougt it was going to be.
Turns out the reason it was stuck was because some dipstick screwed it on waay to far, past where the thread ended.
All out
due to the (also irritating) design of the inner fork tubes, they came straight out and to get the fork seals out I had to spend about half an hour pulling, poking, prodding and snipping with pliers and wire cutters to get them out
and the other one
Now for a funny (and facepalmish) moment. I bought some metal epoxy to try on the fork tubes
Once I had a fair amount of it on and it had hardened for almost the specified time, I found that getting it thin enough to cover the pitting but not to come off completely was damn near impossible
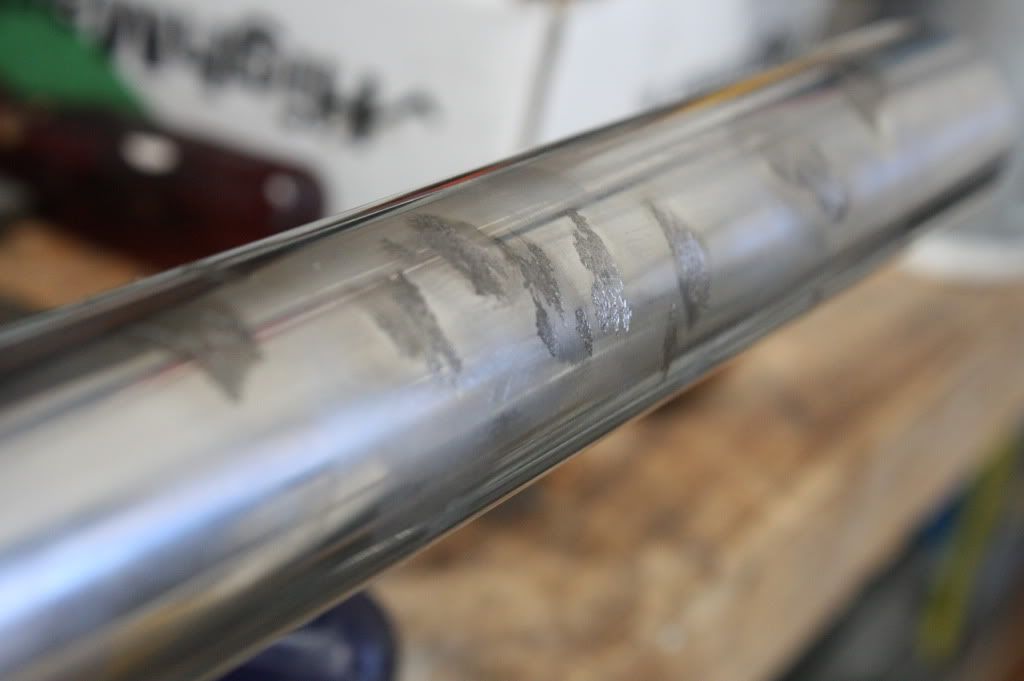
Then i realized that I hadn't stripped the pitted sections all the way down to the metal
<

Wirewheeled all the pitted sections down and then called it a day
Te audire no possum. Musa sapientum fixa est in aure.
Forum whore
I got my trailer shock from same guy.Seems to work ok but its only on a trailer so prob not the best way to test them for performance.
http://www.youtube.com/watch?v=aGsol...a6AUAAAAAAABAA
I have evolved as a KB member.Now nothing I say should be taken seriously.
Hardcore Biker
Wow! thats a very nifty little thing
Does it change the handling much and/or do you have to take special considerations with it?
Te audire no possum. Musa sapientum fixa est in aure.
Hardcore Biker
I tried the putty epoxy again today. Same result funnily enough.
It did work a lot better this time because a) I could apply it thiner b)I took my time sanding it down (who knew it could make things better?)
But still it came off where I didnt want it too and still was a horrible grey colour that I would have had to cover up with a tacky chrome paint or something.
Gonna give some clear jb weld a try. The shiny bare metal in the pits doesn't look too dissimilar to the chrome plating so clear should be good.
Te audire no possum. Musa sapientum fixa est in aure.
Jam and tarts....
I'd drill that shock hole out to, say 8-10mm and then sleeve down the hole on the swing arm.
Alloy, stainless and Ti polishing.
Bling your bike out!
PM me
Hardcore Biker
After thinking things through very carefully -tui ad there- I wondered if I could get the top off the original shocks and stick them on the bottom of the new ones (or the top?)
A bit of fiddling later I managed to get the trademe shocks apart too see how they work. Turns out the problem section and the spring holder-on-thing just screwed into the damper rod. Very nice.
Onto the origional shocks and a bit more time spent fiddling and trying various things, then I finally managed to get them apart!


and so on
it took me, my dad and the, tie-a-million-cable-ties-on-while-at-full-preload method to get it off but its off.
After a lengthy intelligent discussion about the various ways to machine the pieces to fit together, I realized that now that it was apart, why not clean it up and reuse it?
SO I think that's what I'll do. It'll be easier then retrofitting other shocks to fit and the spring/damping rates will stay the same.
Sorry no pics, I CBF'd going through the process of getting them online for only two photos. I'll stick them in the next update
Te audire no possum. Musa sapientum fixa est in aure.
There are currently 1 users browsing this thread. (0 members and 1 guests)
 Posting Permissions


 Reply With Quote


Bookmarks