
 Forum whore
 Muddler/Dabbler.
[QUOTE=Flettner;1130743335]Yes, thats the sleeve cylinder, Good, if it ever works.
I have some other cylinder types in mind /QUOTE]
Well, the engine which (I think, but I may be wrong) inspired that one, worked well by all accounts, but I'm sure there were times when there were some doubts!
Muddler/Dabbler.
HUSA,
Found this one which gives a very clear description of the lost wax process.
https://www.youtube.com/watch?v=1rgfT-PlXqU
Muddler/Dabbler.
Flettner,
What is that sleeve made of? is it plated?
Guess it's stroke wouldn't need to be much more than the height of the ex. ports?
Anorak

Thanks.............Originally Posted by WilDun


Kinky is using a feather. Perverted is using the whole chicken
Forum whore
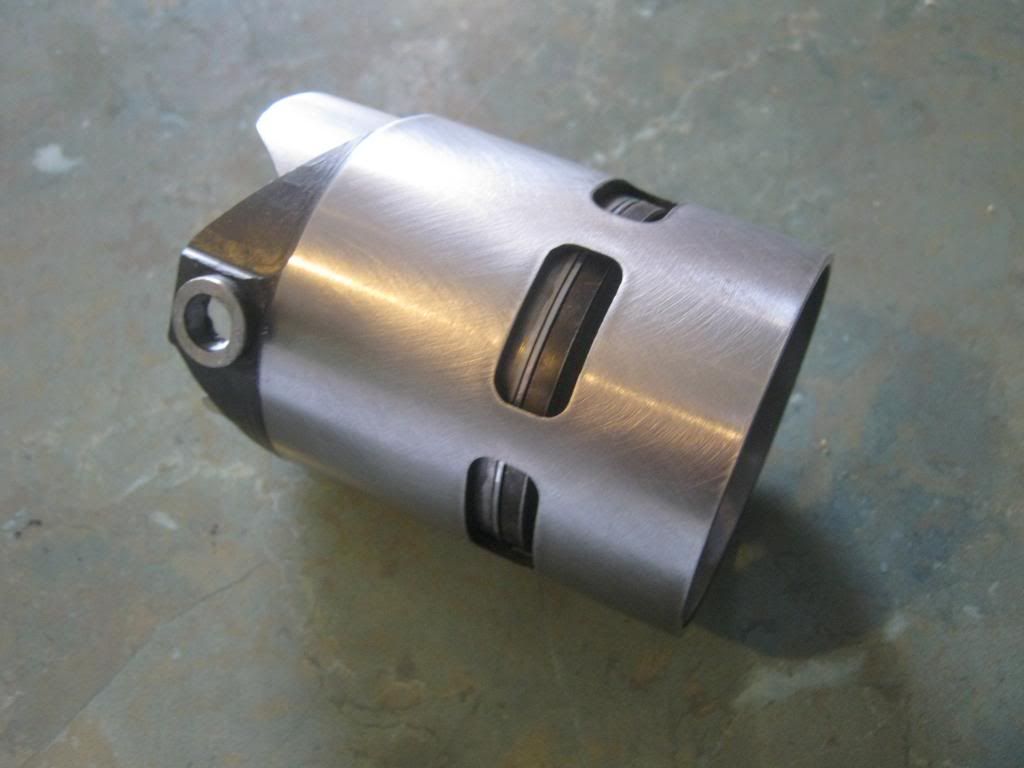
Made from 4140, it will be nitrided before opperation. This was very nessasary in the Crecy design also surface finish is important. Piston stroke is 54mm, sleeve stroke is 24mm. There are two small
( 7075 aluminium ) connecting rods either side of the crankshaft running on eccentics to accommodate the sleeve movement.
Muddler/Dabbler.
Yes, the Crecy was the design i was talking about - guess all the promising designs like this stopped dead when the jet engines took over!
I don't see any oscillation mechanism for the sleeve on your design, so I guess you are going to try a reciprocating only arrangement first?
(Looking at the picture again, I wasn't sure whether there was only one lug or two on the bottom of the sleeveand thought that if it was only one, it could be an oscillating arrangement, but seeing that there are two rods ...............
Last edited by WilDun; 10th July 2014 at 20:15. Reason: Addition
Forum whore
Two lugs, two small rods run off an two eccentrics on each side of the crank.
I'm not sure how important the sleeve oscillating is? In the fourstroke engines it was nessesary for port timing, in the Crecy the sleeve oscillation was a funtion of how the drive worked. It was only a small sideways movement, I don't think it's that important although I guess I'll find out. Eventully I would like to run the sleeve drive off a separate shaft so it's timing can be changed on the fly.
Muddler/Dabbler.
I also couldn't figure out why the Crecy liner needed to rotate, but I'm sure I read somewhere that the rotation was important to ensure even distribution of oil right around the close fitting liner.
Whether or not I was reading about the Crecy design, the Bristol, or Napier four strokes, I can't really remember, but I'm sure it would be significant (at least in those aero engines where periods in between regular maintenance would have been very important).
Seems to be a good idea to be able to change the timing (infinately variable controlled by electronics?).
Forum whore
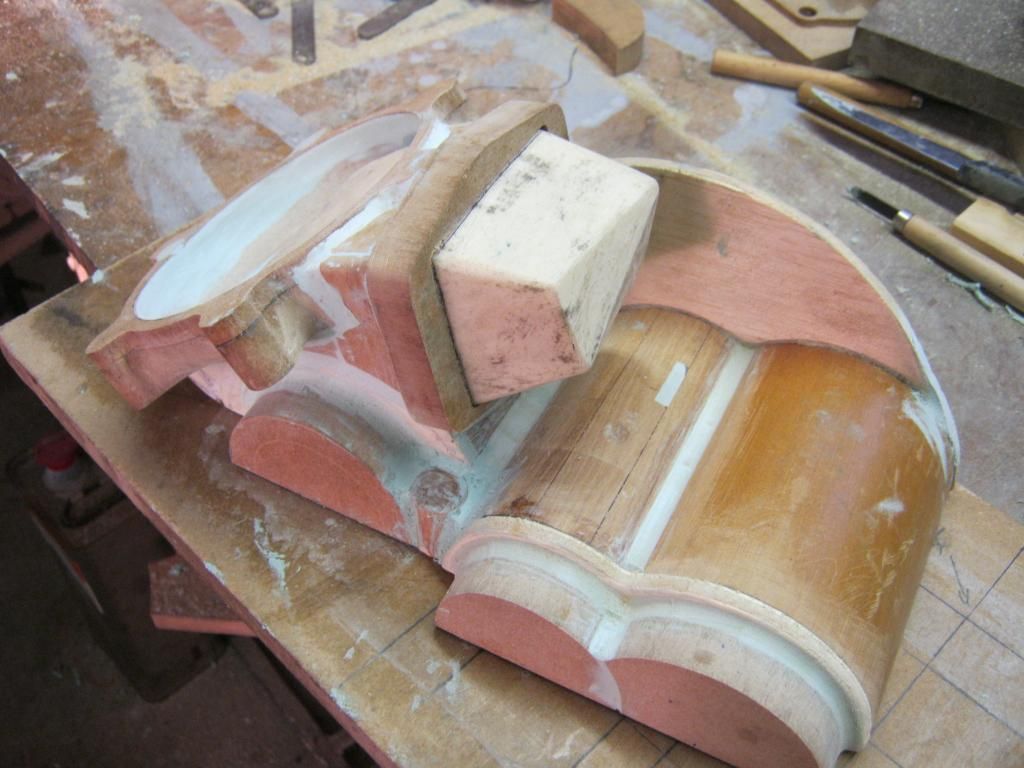
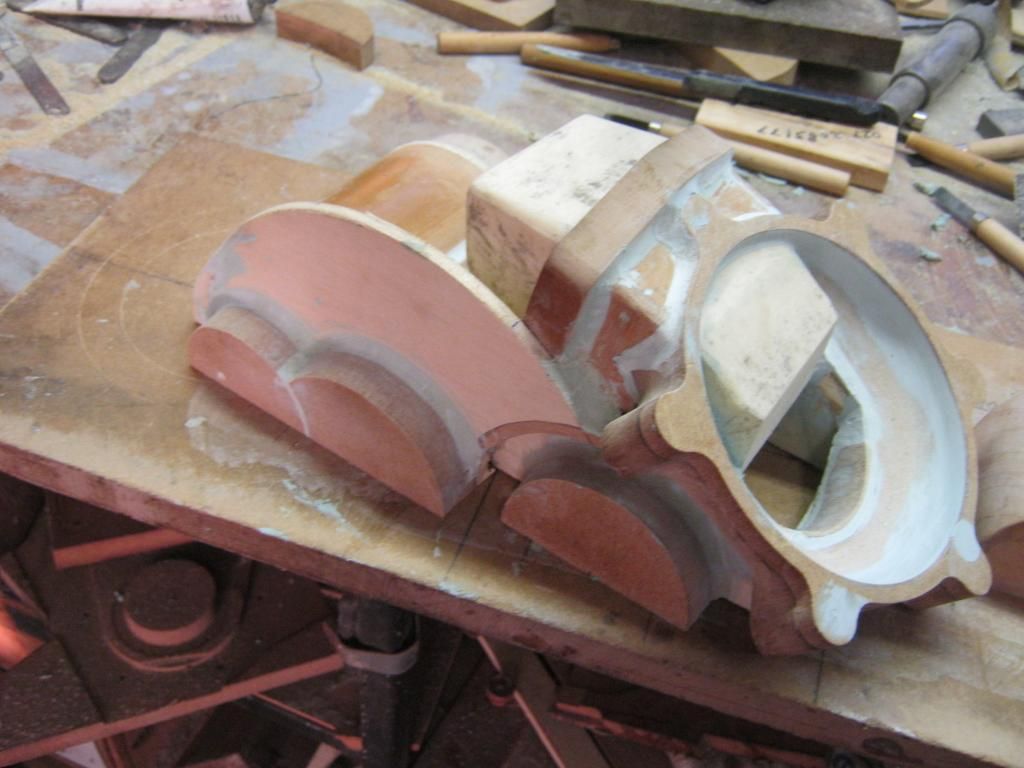
A Sunday afternoon of progress, bearing housings in place and the reed block core in place.
Muddler/Dabbler.
So, as I see it, that is the top half of the pattern (less sprues, risers etc.) which will produce a void complete with coreprints ready to receive the actual sand cores, locating them in the correct position? -
To me, it doesn't look as though it will end up being just a simple two piece pattern!
Then possibly I still haven't got my head around it!
Forum whore
Simple two piece pattern, did I say that? Well It might have started out that way but there will have to be two or three cores it seems. I used this reed core as I already had it made for the 700cc gyro engine. Suits a nice fat V force reed block. This will run a carburetor for a start but I will add lugs to the pattern so I can fit injectors ( three ) later if needed.
Muddler/Dabbler.
No you didn't say that but I assumed it would be! - I can see that it isn't and also that I have a lot to learn in the patternmaking department!
Back into it again after a couple of weeks off and finishing off my furnace now (just having a lunch break)
I'm now making the lid and will let it all sit for a couple of days before firing.
Decided I would continue making it to the original idea I had, then I will think about making a smaller, more lightweight one, similar to the one you have (or had before it was run over!)
The pattern making is obviously a different discipline which I will have to deal with next, but no doubt I'll enjoy that.
All very slow but still progressing, - hope you can bear with me and my questions while I try to get it all sorted out!
Forum whore
My progress is slow also, too many projects at once! And too cold at night ( must be getting old ). But come the week end, when time allows, I find working with wood and making patterns enjoyable.
Got an off cut of 120 dia 4140 bar today ( one meter long ), should be good for a few crankshafts. I have a few to make.
Do you know anything about pull broaches for making internal splines? I've priced up a tool ( broach ) but have never seen a pull broach machine at work. I imagine it's just a hydraulic cylinder pulling the broach through a pre sized blank, nice and concentric. What loads are involved I wonder?
Usually I make my internal splines in the shaper with rotary table fitted. Works well but real slow, not good for making many gearboxes.
Muddler/Dabbler.
Sorry I have never used a 'pull' broaching machine, but I've used quite large "push" broaches in a hydraulic press (for keyways and hexagonal holes in 316 stainless) and have also seen quite a few break (not by my hand though!).
I believe that 'pull' broaches use hydraulics and also are much safer to use. Couldn't put a figure on force required but we managed with a 30 ton press.
Broaching to me in general is a scary thing, particularly if it's not lined up properly and well lubricated! - The pull broach would probably be a lot safer here.
I would say that 4140 in it's annealed state would be easier than 316 stainless,(less likely to gall up) but even though I've done quite a lot of broaching I never did quite reach 'expert' status.
I'm sure I have a book on broaching here somewhere - won't be too far away and maybe you can find it useful, so I'll have a look for it tonight - don't think I'll be needing it anymore!
PS: there is a case here for having a gear shaper for bigger internal splines (depending of course what size you would be doing) - doing them with a conventional shaper or slotter on a mill is a soul destroying job in my opinion! - But there are times when there is no other way I guess.
There are currently 1 users browsing this thread. (0 members and 1 guests)
 Posting Permissions

 Reply With Quote

Bookmarks