Page 2 of 337 FirstFirst 12341252102 ... LastLast
Results 16 to 30 of 5043

Thread: The Bucket Foundry

  1. #16
    Join Date
    31st July 2005 - 11:15
    Bike
    a shed full of crazy shit
    Location
    Palmerston North
    Posts
    2,201
    Choice

    This is something I've always been really interested in trying out. I've attempted in the past (rearsets and levers) pretty much all a failures. Always had a dream of casting my own cylinders...

    It's so cool to see that the old " backyard, it can be done" is still live and well here in NZ.

  2. #17
    Join Date
    20th January 2010 - 14:41
    Bike
    husaberg
    Location
    The Wild Wild West
    Posts
    11,817
    Quote Originally Posted by Flettner View Post
    The white sand you see is CO2 hardening sand ( cold process ), just pack it in then apply CO2 gas and will harden up instantly. This sand is not as strong as the shell hot sand process but it's good for less inticate parts. I'm not sure what is mixed with the sand, Husaburg will know.

    "Waterglass" sodium silicate.
    a decent chemist might have it the oldies used to use it for preserving eggs or something.
    From what i understand it is possible to harden it by heating it in a dirty oven as well as the CO2

    http://www.metcast.com/index.php/san...sodasil-g.html


    Add some to Budha's oil....

    Potters us in in glazes (i think) most of the pottery supply places have it.
    http://www.pottersclay.co.nz/rawmat.htm
    Quote Originally Posted by Katman View Post
    I reminder distinctly .


    Kinky is using a feather. Perverted is using the whole chicken

  3. #18
    Join Date
    20th January 2010 - 14:41
    Bike
    husaberg
    Location
    The Wild Wild West
    Posts
    11,817
    Quote Originally Posted by Katman View Post
    I reminder distinctly .


    Kinky is using a feather. Perverted is using the whole chicken

  4. #19
    Join Date
    12th March 2010 - 16:56
    Bike
    TT500 F9 Kawasaki EFI
    Location
    Hamilton New Zealand
    Posts
    2,764
    What about pictures of a 175 cylinder ( water cooled ) being built? I have a job to build said cylinder to suit the YZ125 engine.
    I'll lift ports from another cylinder as a starting point. Interested?

  5. #20
    Join Date
    20th January 2010 - 14:41
    Bike
    husaberg
    Location
    The Wild Wild West
    Posts
    11,817
    I am..........
    Quote Originally Posted by Katman View Post
    I reminder distinctly .


    Kinky is using a feather. Perverted is using the whole chicken

  6. #21
    Join Date
    26th April 2006 - 12:52
    Bike
    Several
    Location
    Hutt Valley
    Posts
    5,120
    Quote Originally Posted by Flettner View Post
    What about pictures of a 175 cylinder ( water cooled ) being built? I have a job to build said cylinder to suit the YZ125 engine.
    I'll lift ports from another cylinder as a starting point. Interested?
    Always!
    Heinz Varieties

  7. #22
    Join Date
    4th January 2009 - 21:08
    Bike
    YLR150RR and a RD350LC
    Location
    Not far from Ruapuna
    Posts
    2,368
    the 175 sounds great, you could bring the 360 cylinder over here too if you wish, I find it hard to find the posts in the ese thread as there is so much else going on in there
    My neighbours diary says I have boundary issues

  8. #23
    Join Date
    18th May 2007 - 20:23
    Bike
    RG50 and 76 Suzuki GP125 Buckets
    Location
    Auckland
    Posts
    10,473
    Quote Originally Posted by Yow Ling View Post
    I find it hard to find the posts in the ese thread as there is so much else going on in there
    Try page 880 for everything so far.

  9. #24
    Join Date
    20th January 2010 - 14:41
    Bike
    husaberg
    Location
    The Wild Wild West
    Posts
    11,817
    Quote Originally Posted by TZ350 View Post
    Try page 880 for everything so far.
    if you ever want to find anything Neil posts just click on his name and look at his posts or search through the tread tools. it gets harder as he posts more. i find image search's easier but don't try it with me. I seem to post a fair few pictures........
    Quote Originally Posted by Katman View Post
    I reminder distinctly .


    Kinky is using a feather. Perverted is using the whole chicken

  10. #25
    Join Date
    18th May 2007 - 20:23
    Bike
    RG50 and 76 Suzuki GP125 Buckets
    Location
    Auckland
    Posts
    10,473
    Everything to date .....

    Quote Originally Posted by husaberg View Post
    "Waterglass" sodium silicate.
    a decent chemist might have it the oldies used to use it for preserving eggs or something.
    From what i understand it is possible to harden it by heating it in a dirty oven.

    http://www.metcast.com/index.php/san...sodasil-g.html


    Add some to Budha's oil....

    Potters us in in glazes (i think) most of the pottery supply places have it.
    http://www.pottersclay.co.nz/rawmat.htm
    Quote Originally Posted by husaberg View Post
    Quote Originally Posted by Yow Ling View Post
    Ah yes this list, plenty of good stuff here, the myfordboy and mr pete are great


    The Myford boy and mrPete22 stuff is worth watching all the videos in the series


    Cores etc

    http://www.alloyavenue.com/vb/archiv...p/t-6993.html?
    http://www.bronzecasting.co.uk/8_san...sodsil_11.html
    http://www.imarketingcenter.com/coresand.html

    materials

    http://www.industrialsands.co.nz/order.html
    http://www.industrialsands.co.nz/resin.html
    http://www.metcast.com/index.php/cat...+Silicate+Core
    http://www.cobcraft.co.nz/StudioTool...tegory=Liquids
    http://www.cobcraft.co.nz/studiotool...tegory=Liquids
    http://www.pottersclay.co.nz/rawmat.htm
    http://www.ryanoresins.com/products/
    How to
    http://www.youtube.com/watch?v=QFLArEHFFHo
    http://www.youtube.com/watch?v=N8DGkC8O9CY
    http://www.youtube.com/watch?v=h-c4_Ukqgx4
    http://www.youtube.com/watch?v=wG9JzeZYPi4
    http://www.youtube.com/watch?v=khEvhjlh_SM
    http://www.youtube.com/watch?v=SQt2RBzepNA
    http://www.youtube.com/watch?v=8tqDL7H-C-o
    http://www.youtube.com/watch?v=TekdQlmvkiU
    http://www.youtube.com/watch?v=hCBRfrPV8BY
    http://www.youtube.com/watch?v=yosykQ-o994

    http://www.youtube.com/watch?v=OedpFHYIkDA
    http://www.youtube.com/watch?v=bzKi4g7jD6I
    http://www.youtube.com/watch?v=khEvhjlh_SM
    http://www.youtube.com/watch?v=Dt2mq...A7F5FD2D3C3088
    http://castinghobbyfaq.bareboogerhost.com/kbond.shtml
    http://home.comcast.net/~oddkins/foundrycasting.html
    http://www.youtube.com/watch?v=0rU2aohquj4
    http://www.youtube.com/watch?v=QWGNl7ijA7g
    Vinamold

    http://fibreglassshop.co.nz/products...meltable-vinyl
    http://www.youtube.com/watch?v=dZGq1...jAnn8E76KP7sQg


    Equipment
    http://www.backyardmetalcasting.com/...emuller01.html
    http://www.ecplabchem.co.nz/content....9-solution-1-l
    http://www.foundry101.com/6.htm
    http://www.budgetcastingsupply.com/index.htm

    Furnace
    http://www.youtube.com/watch?v=jqvWe...endscreen&NR=1
    http://www.dansworkshop.com/2008/03/...ing-furnace-2/
    http://www.submarineboat.com/casting...er_Pot_Furnace
    http://www.flamingfurnace.com/
    http://www.youtube.com/watch?NR=1&v=...ture=endscreen
    http://myfordboy.blogspot.co.nz/p/my...s-furnace.html
    http://www.youtube.com/watch?v=T4SdKN-Kq58
    Quote Originally Posted by Yow Ling View Post
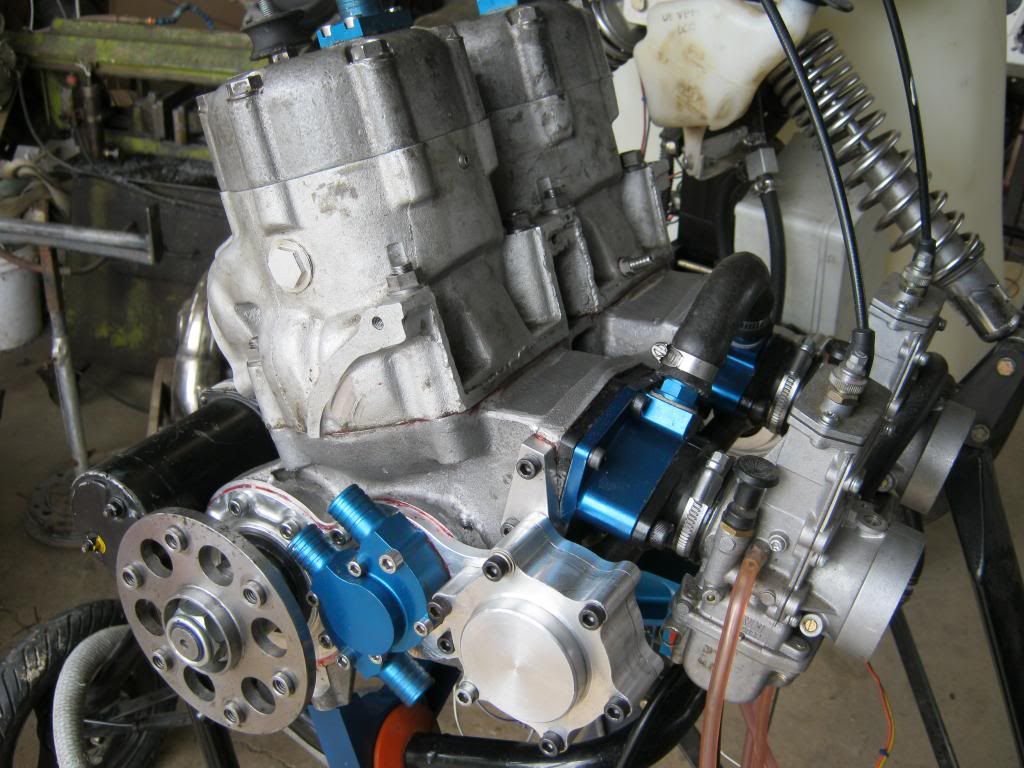
    The foundry or metal casting stuff thats been going on the the ESE thread really inspired me to get on with having a go at this stuff.
    If you can cast metal theres really not much you cant do. I dont think its going to be easy, most of it has been a bit of 2 steps forward 1 step back so far.

    Im actually an old hand at this I cast a sinker weight or a sandwich toaster when I was in 4th form metalwork, I suspect not much has changed in the last 35 years since then.

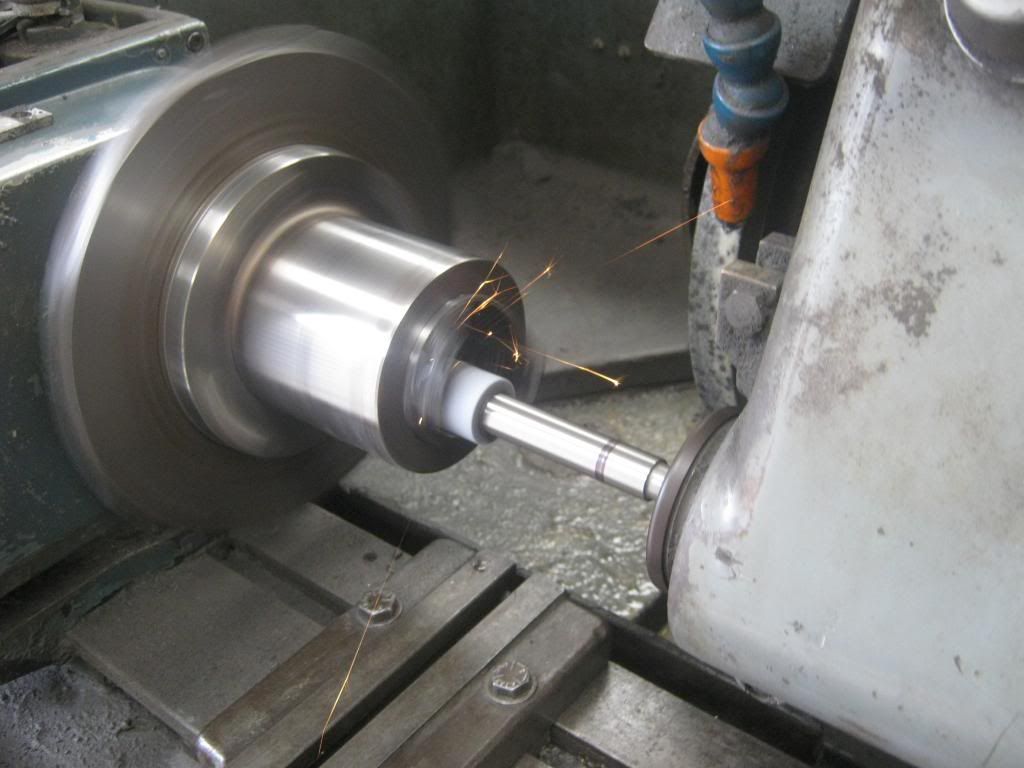
    First I found myself a furnace, looks nice but with the burner it had was struggling to melt cheese, I now have a new burner with a gentle breeze from a small blower.


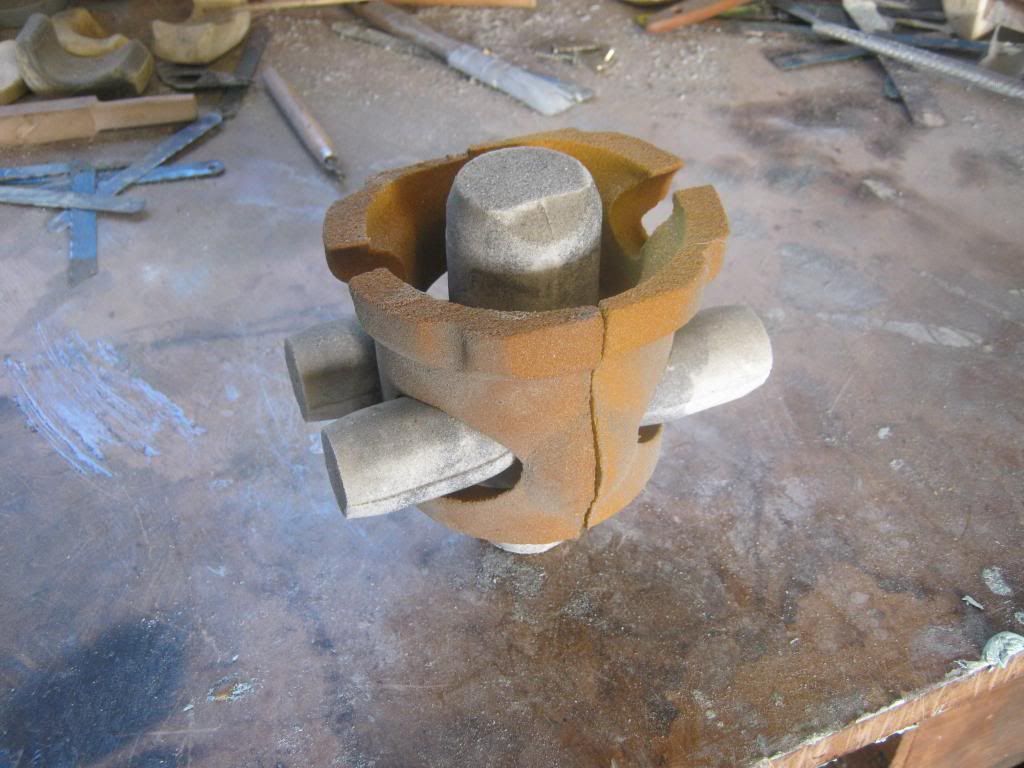
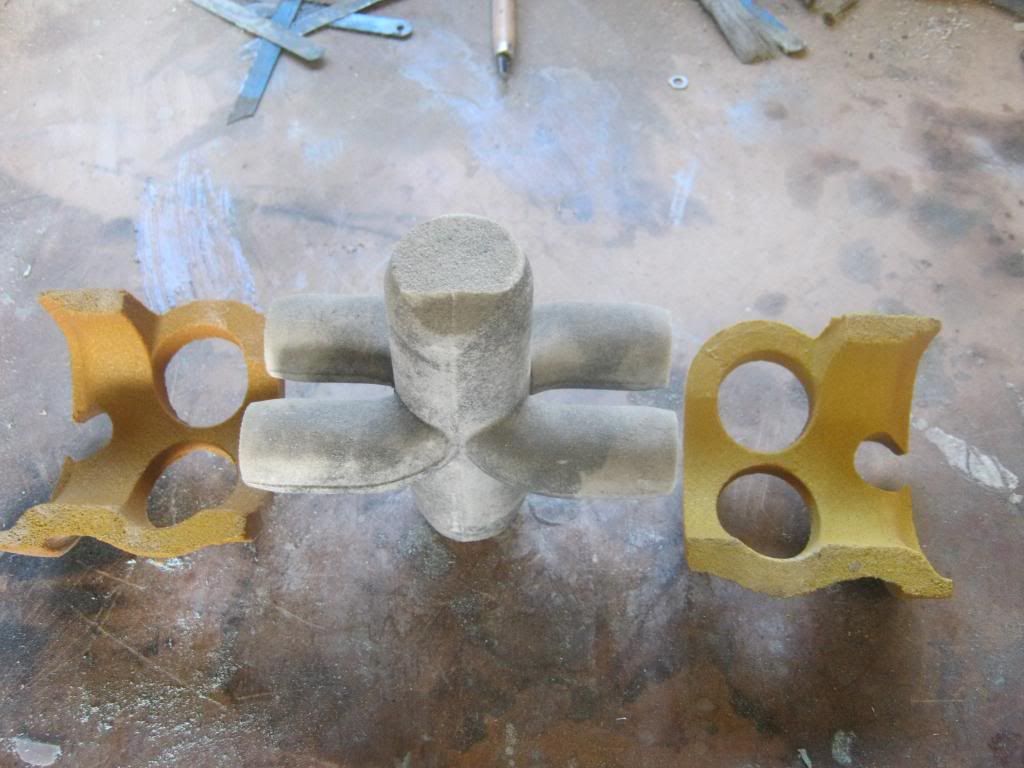
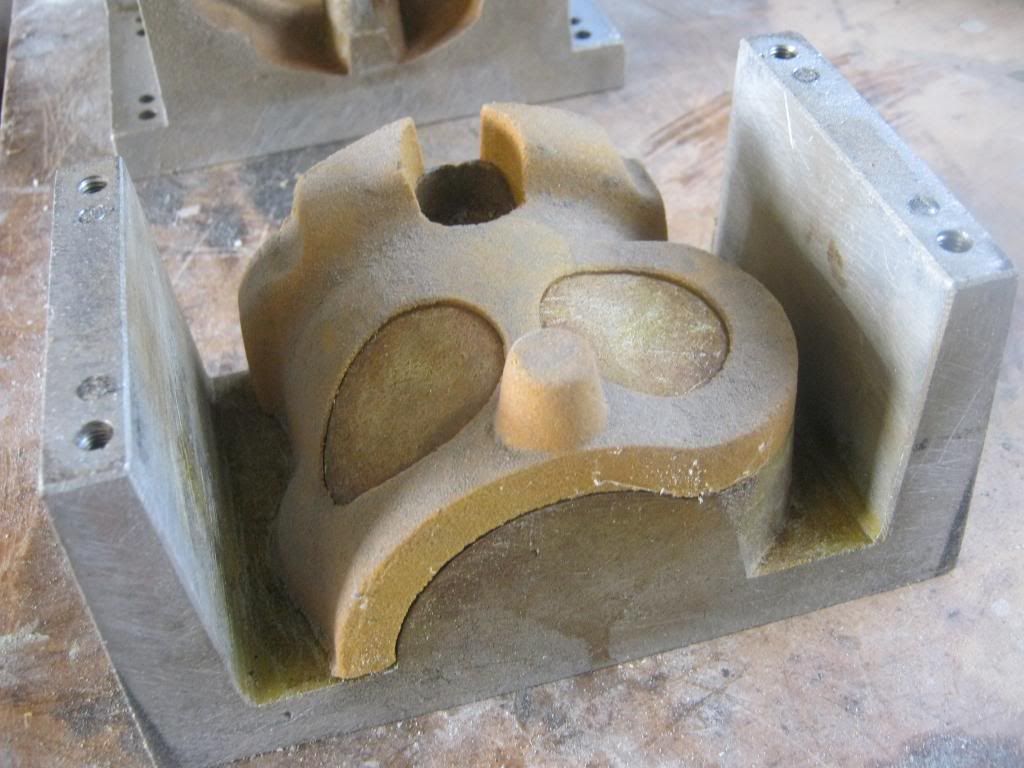
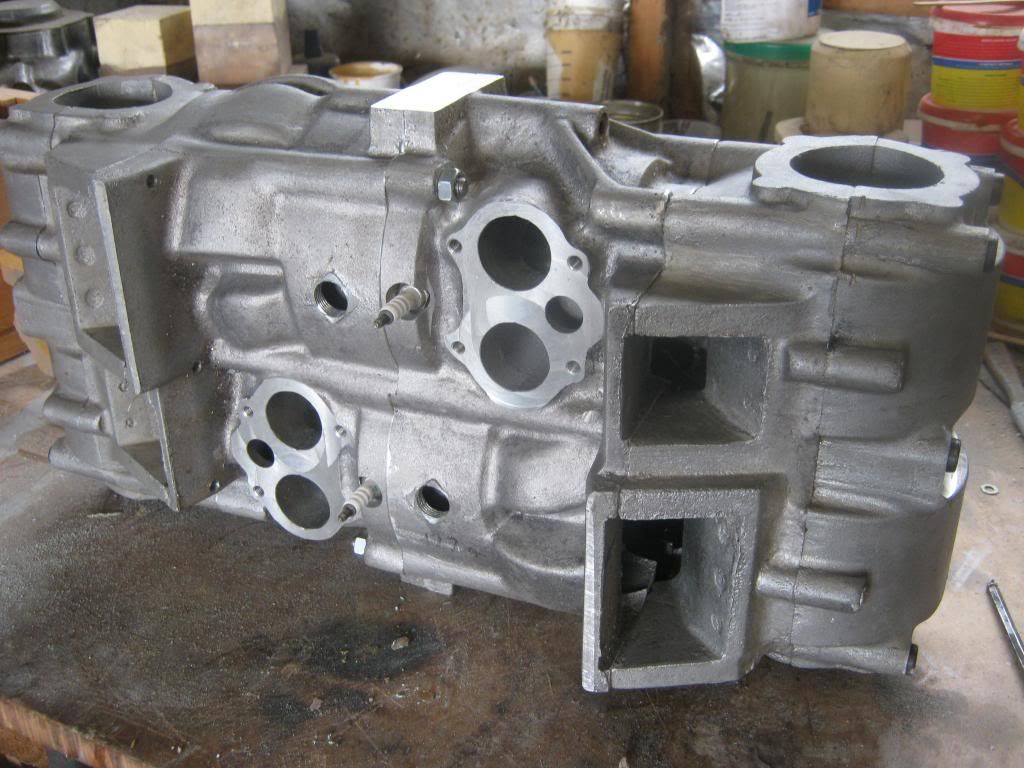
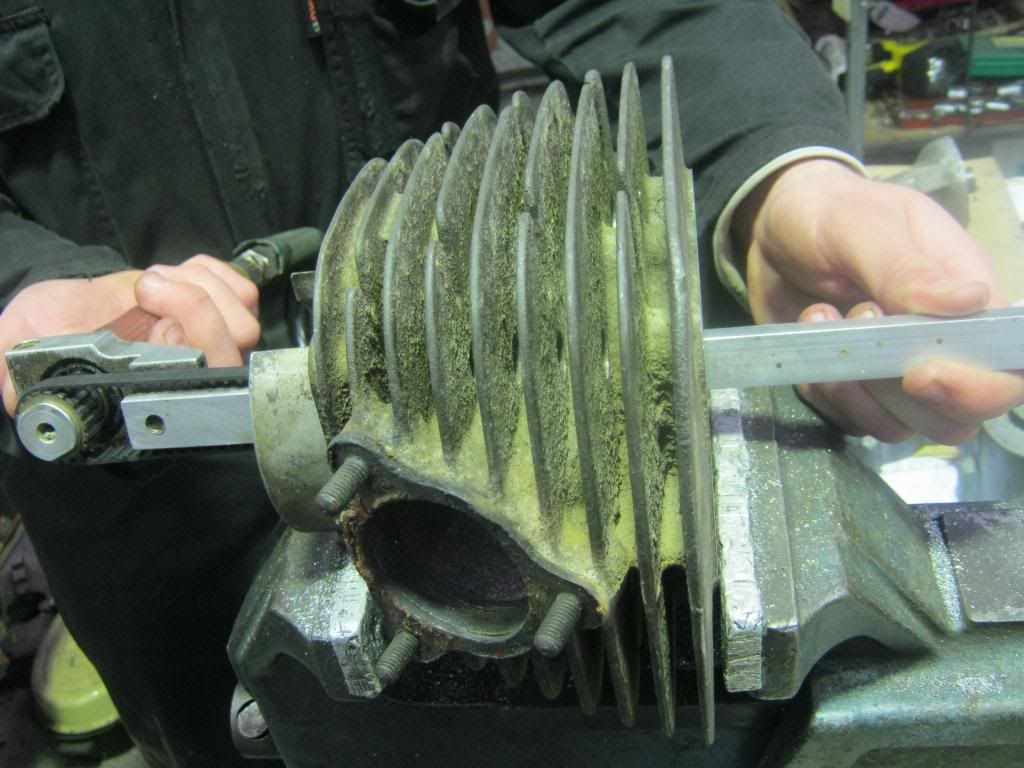
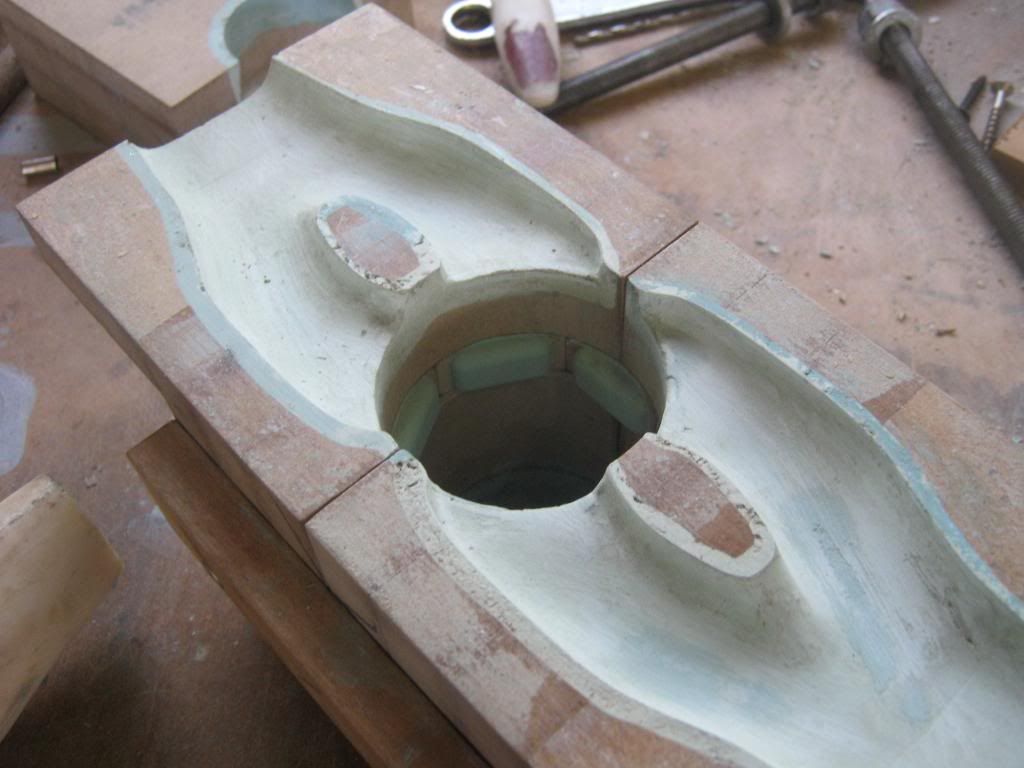
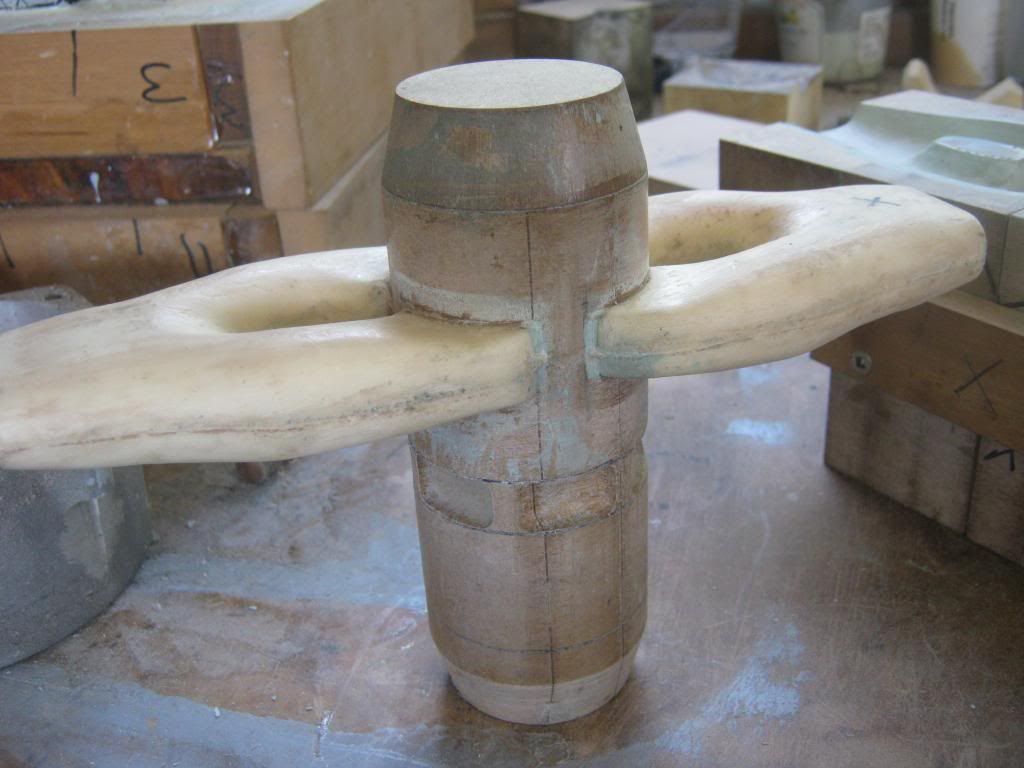
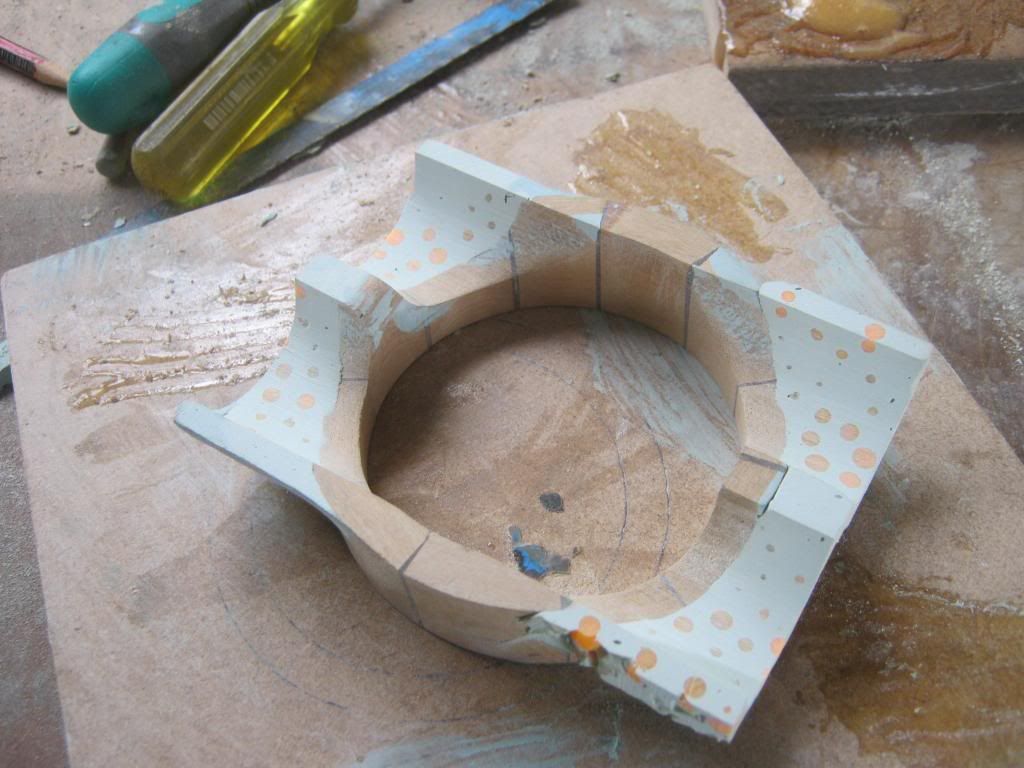
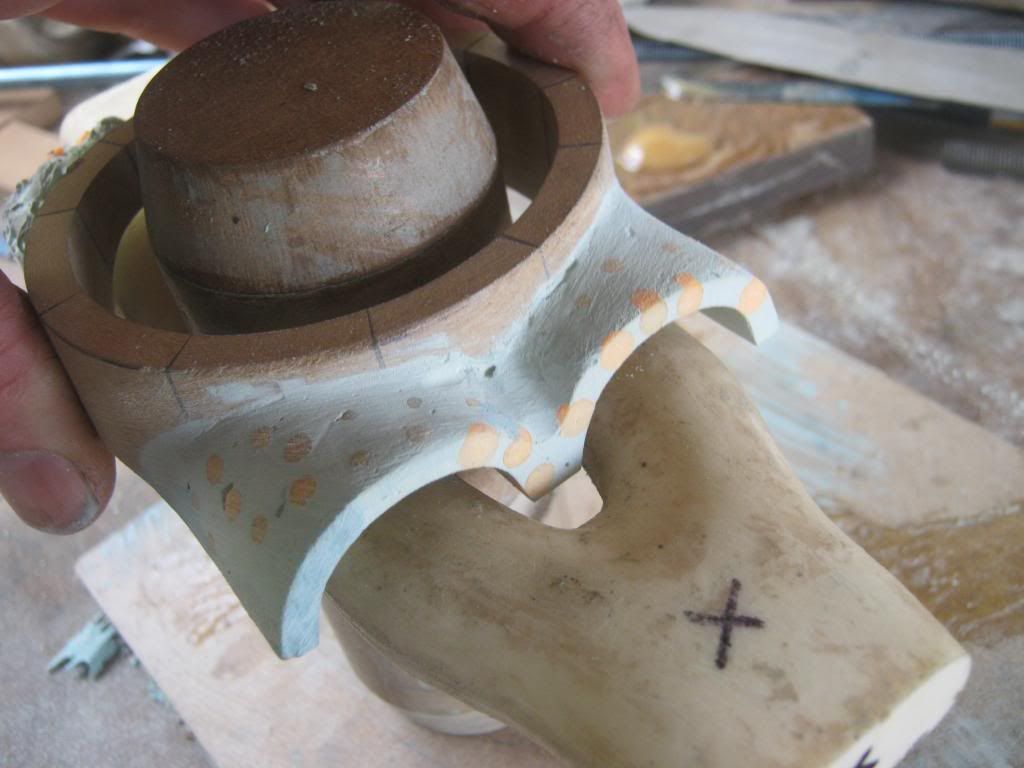
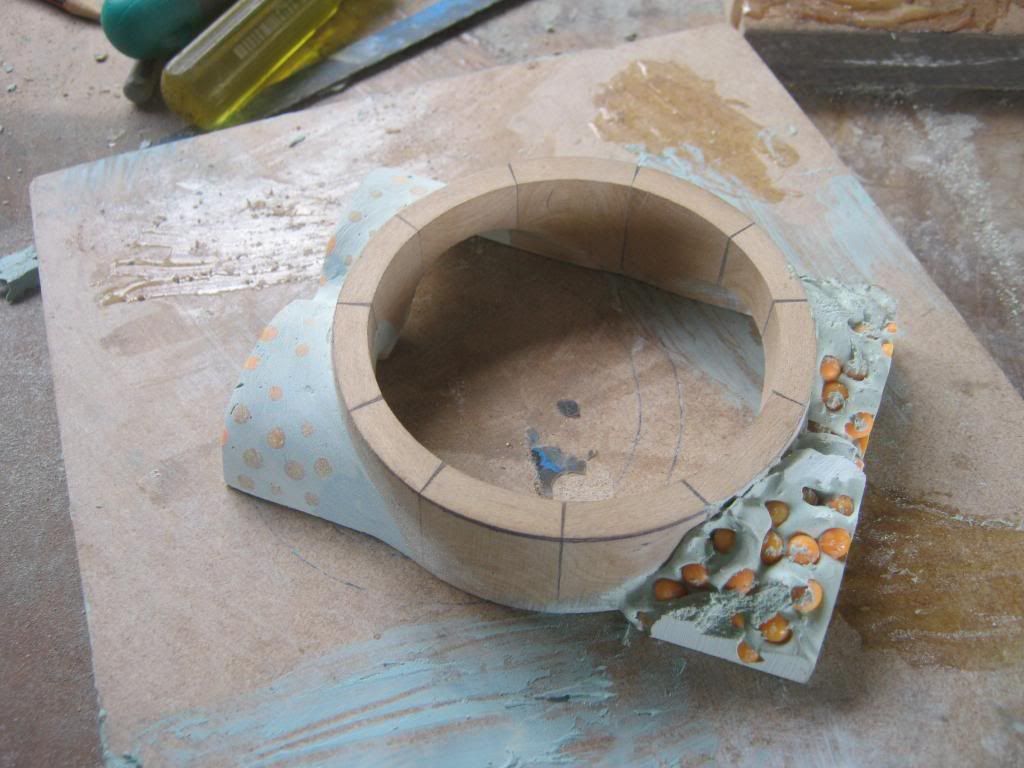
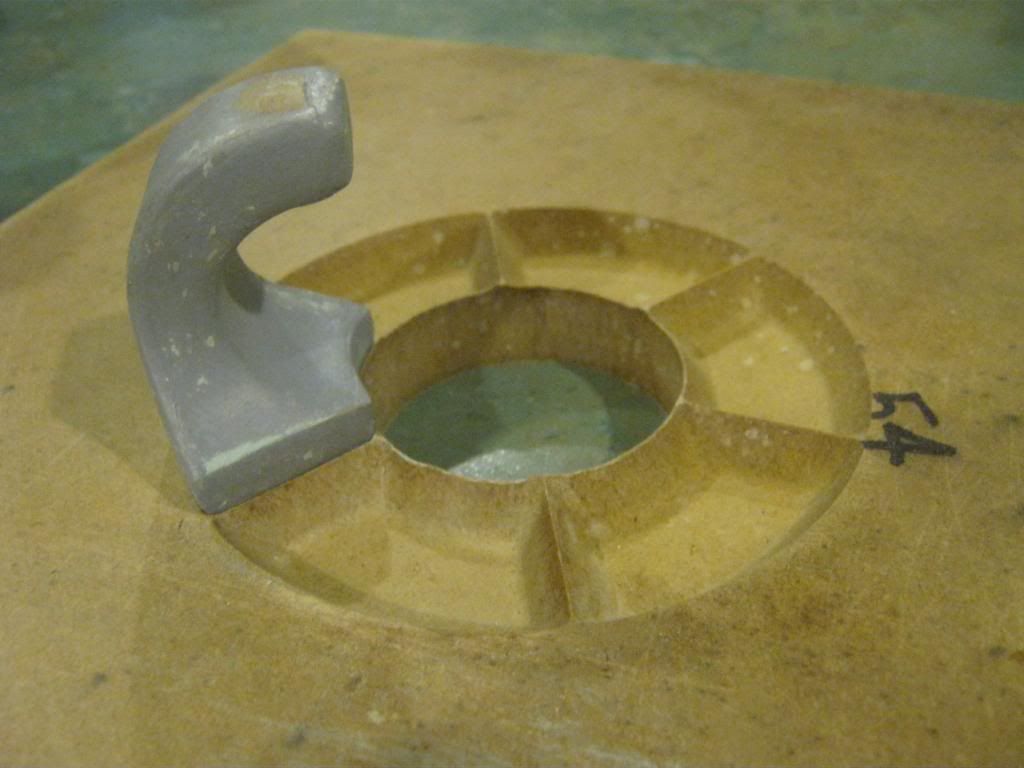
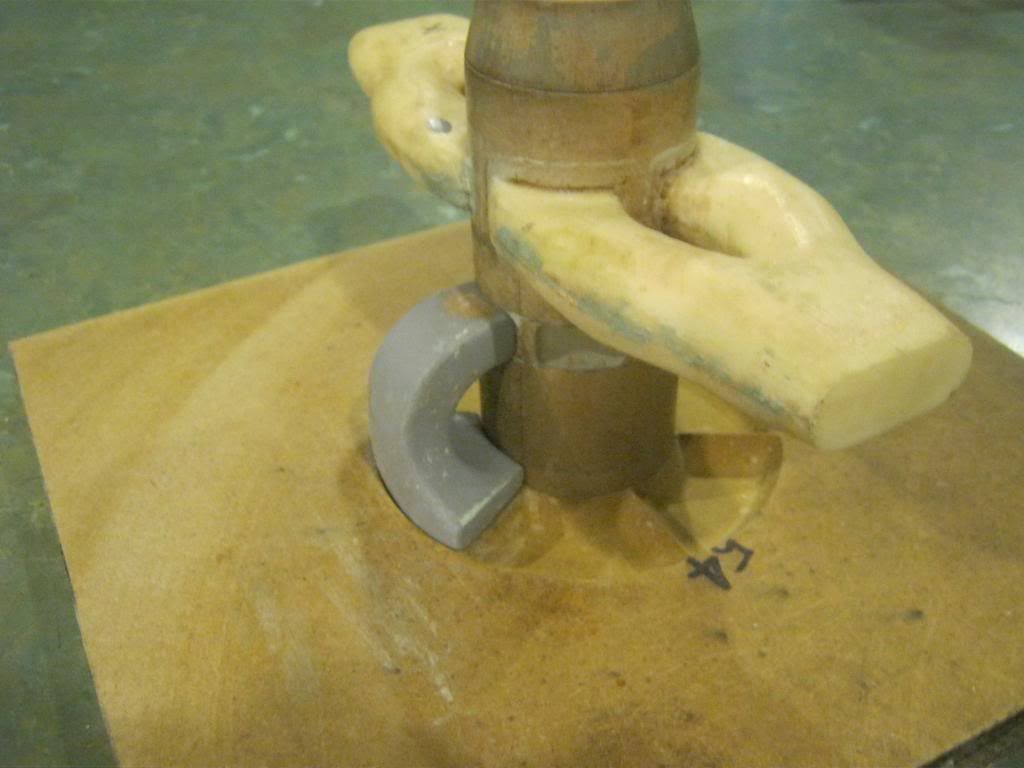
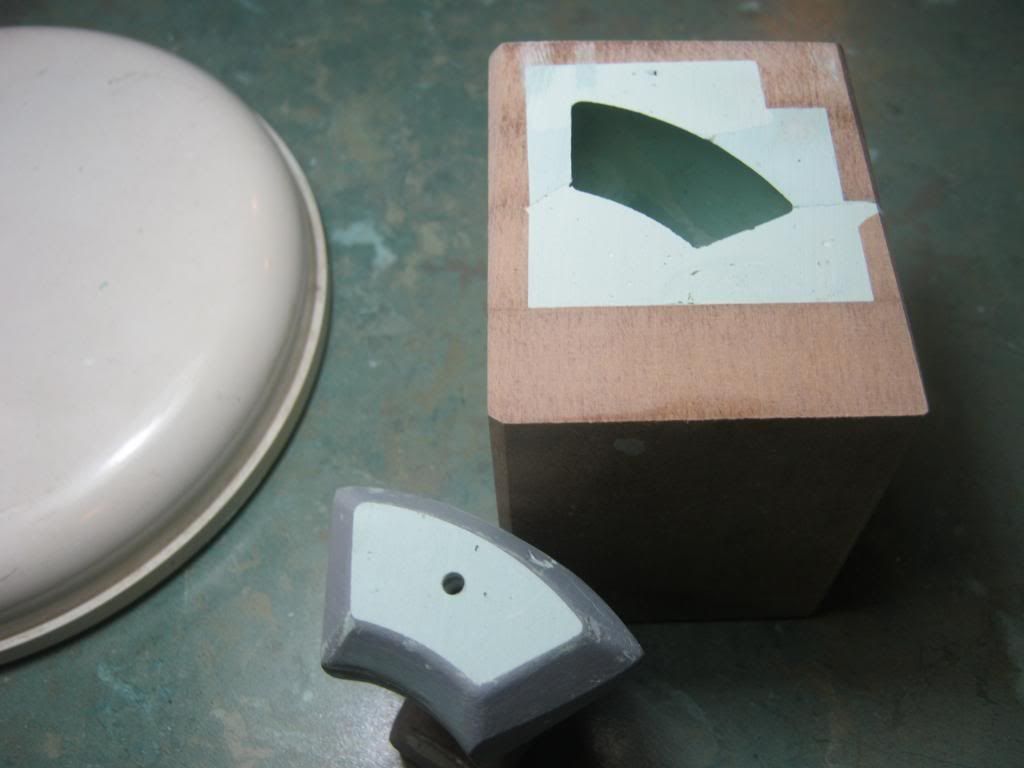
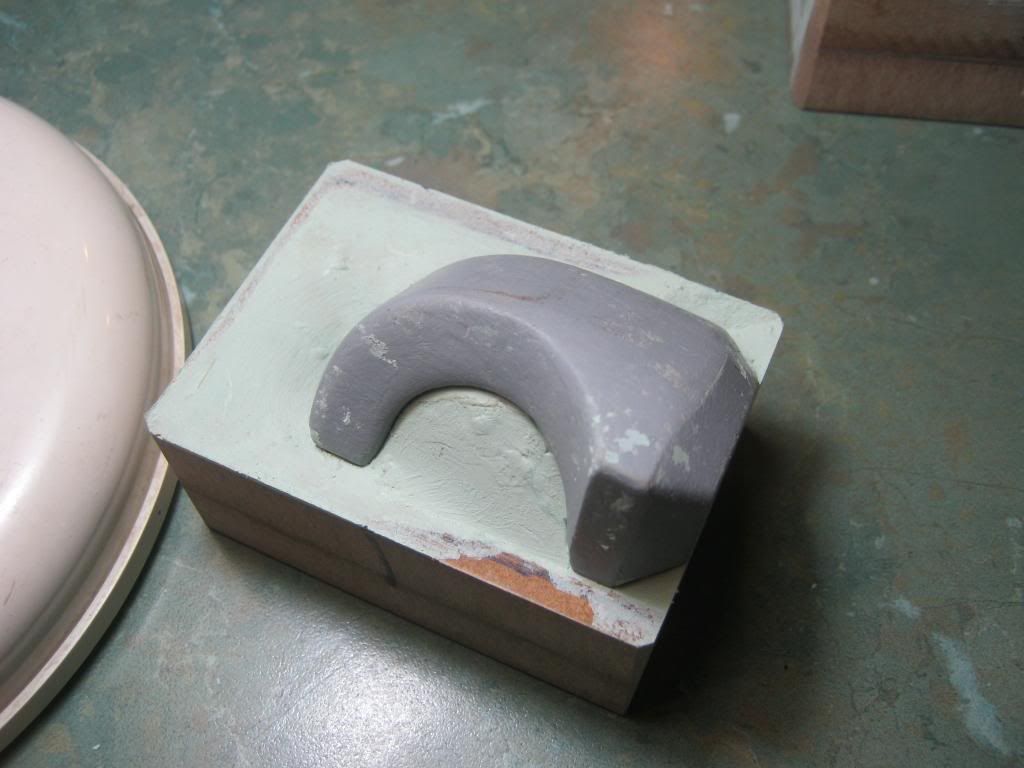
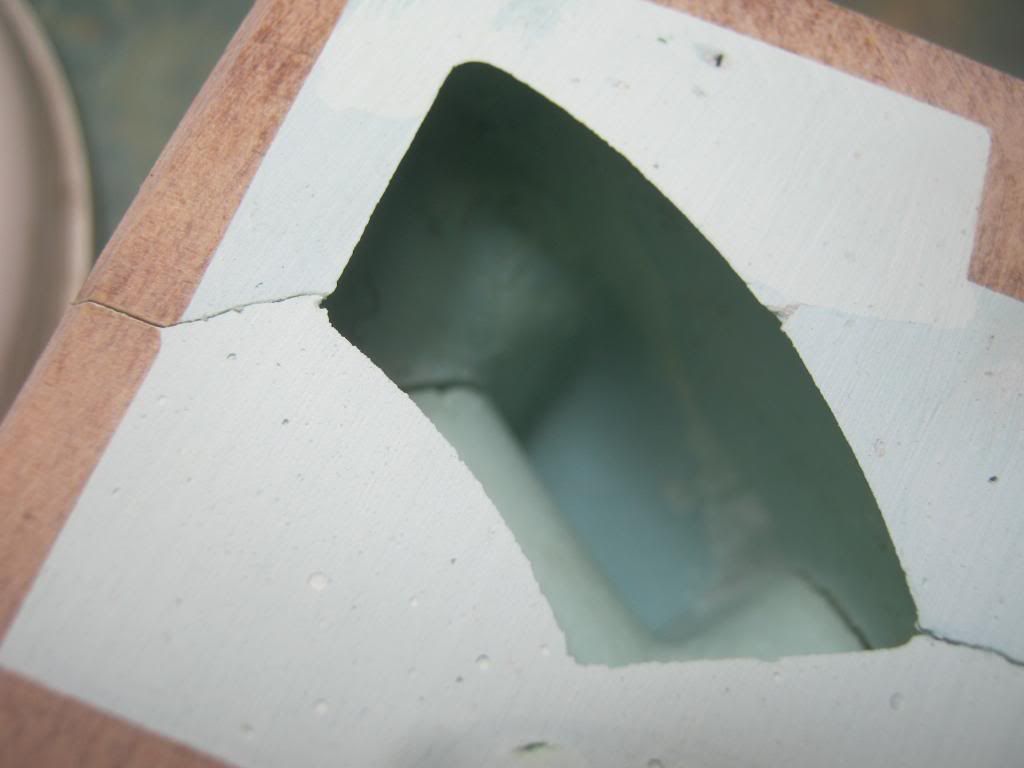
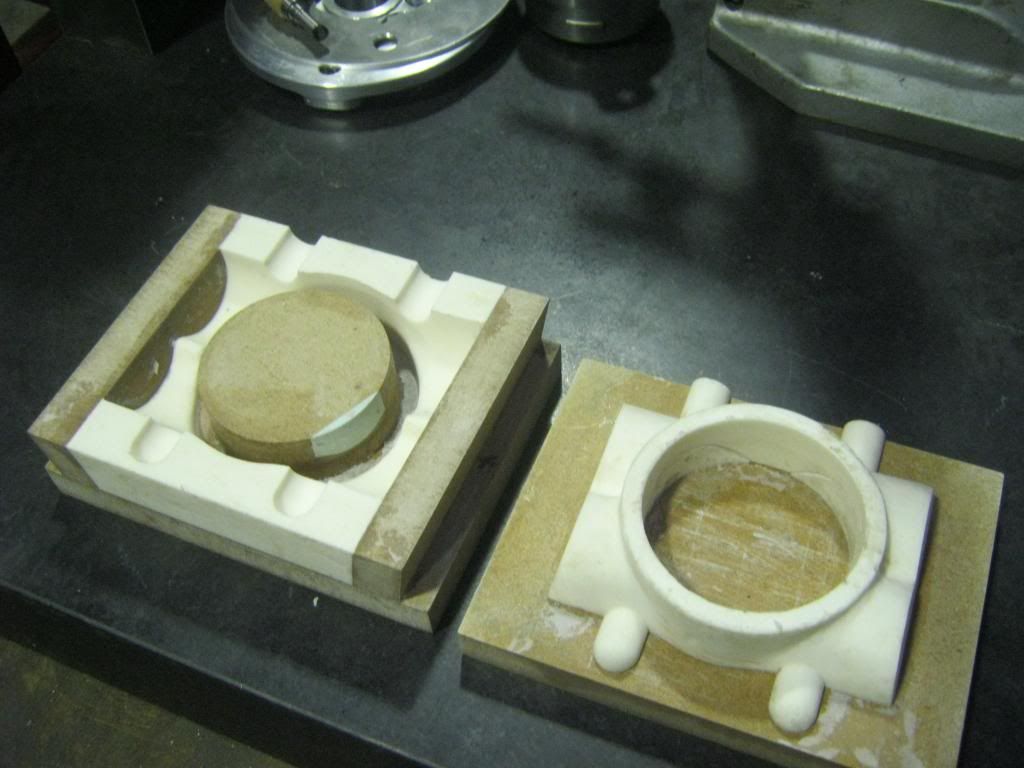
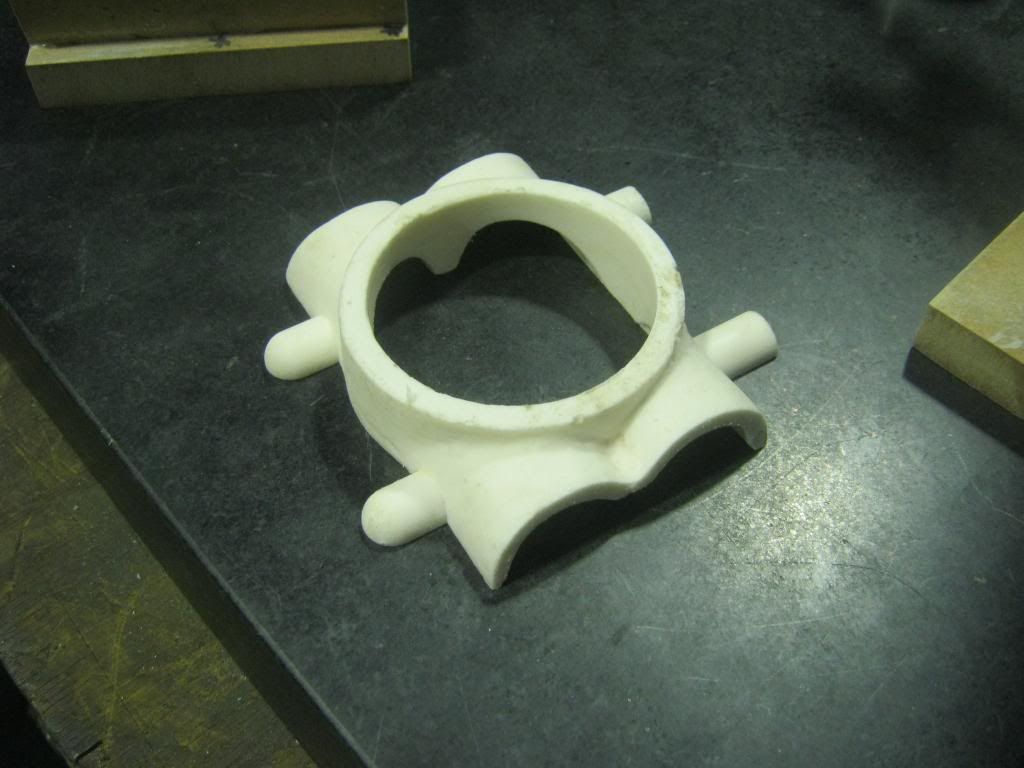
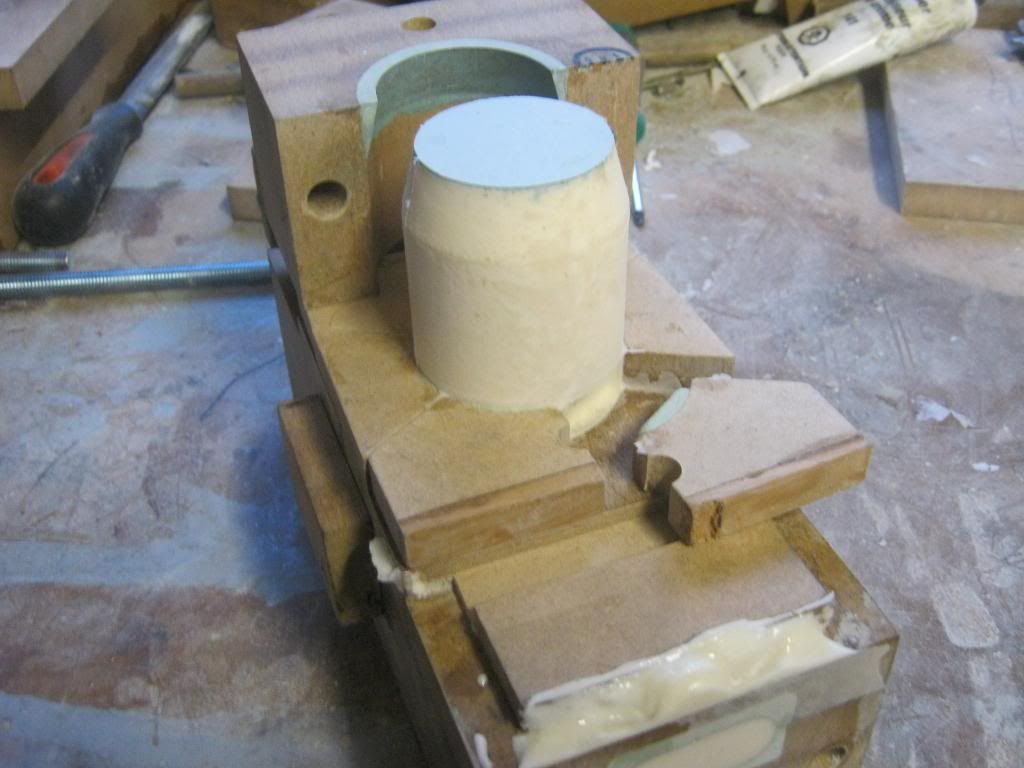
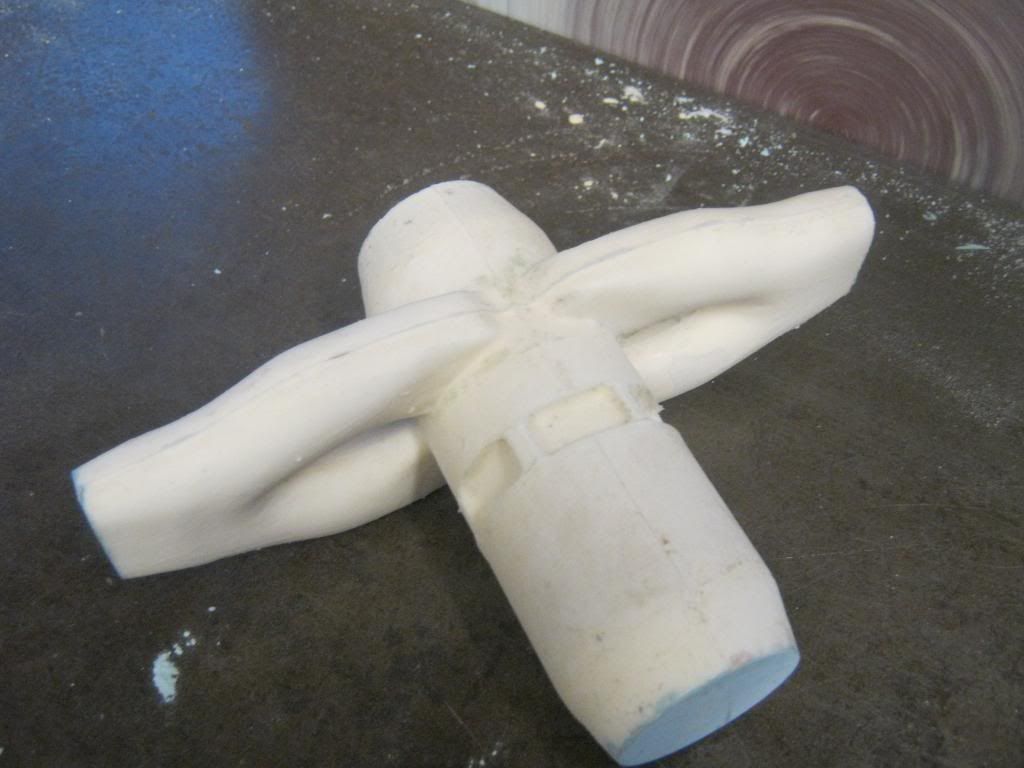
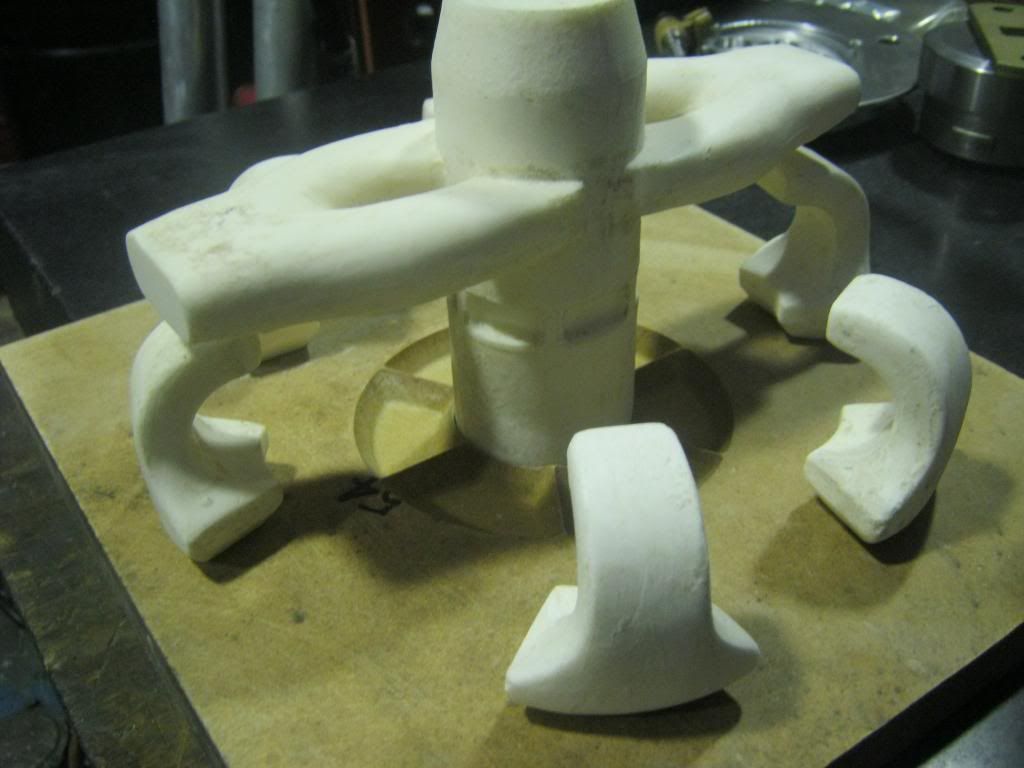
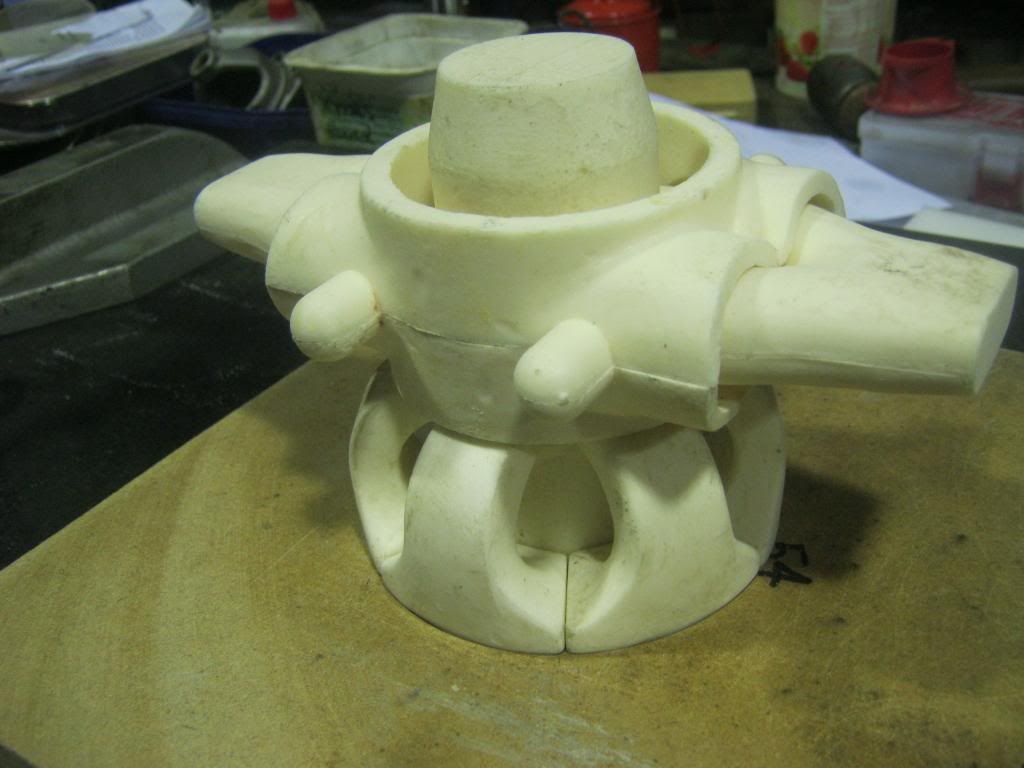
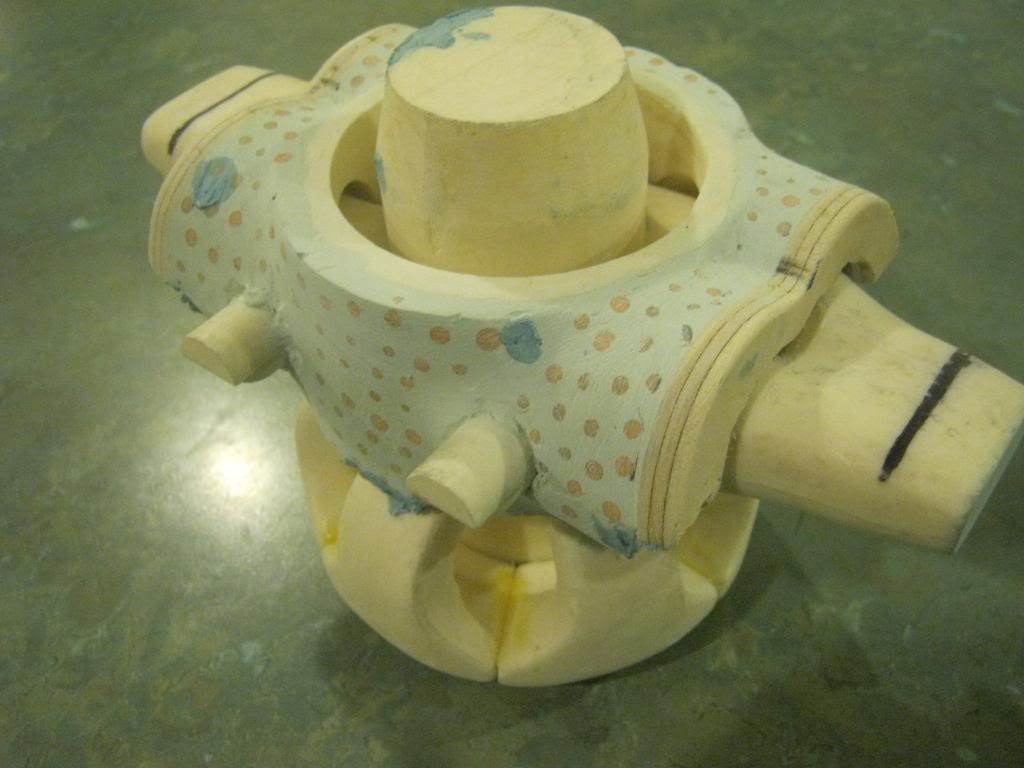
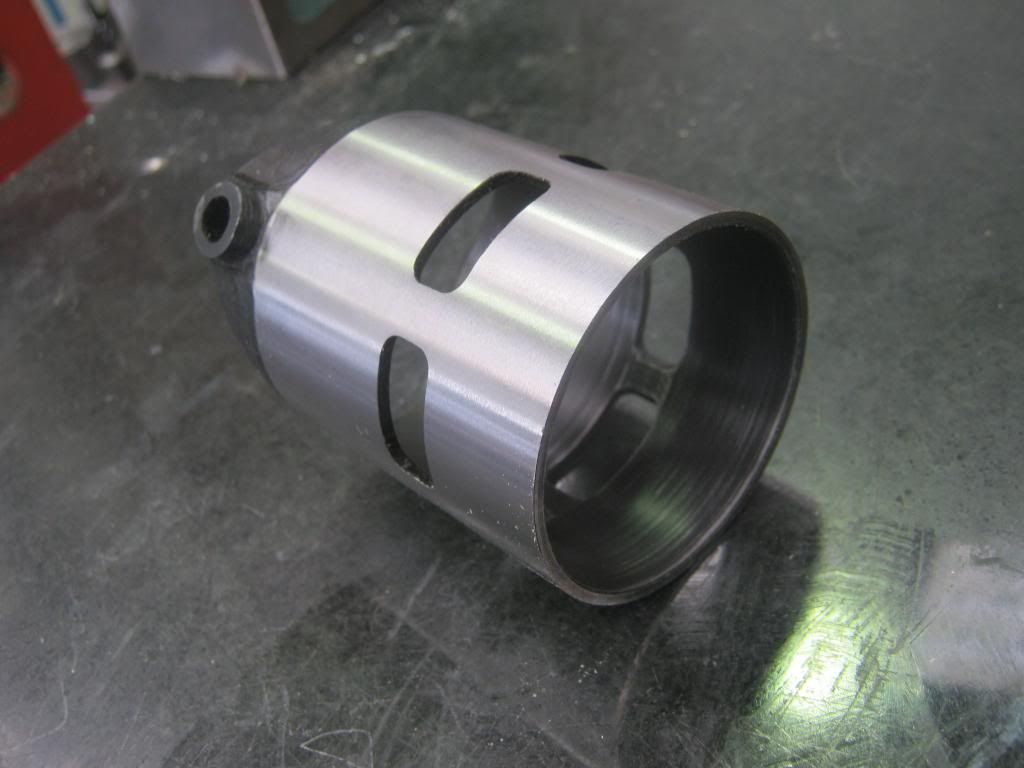
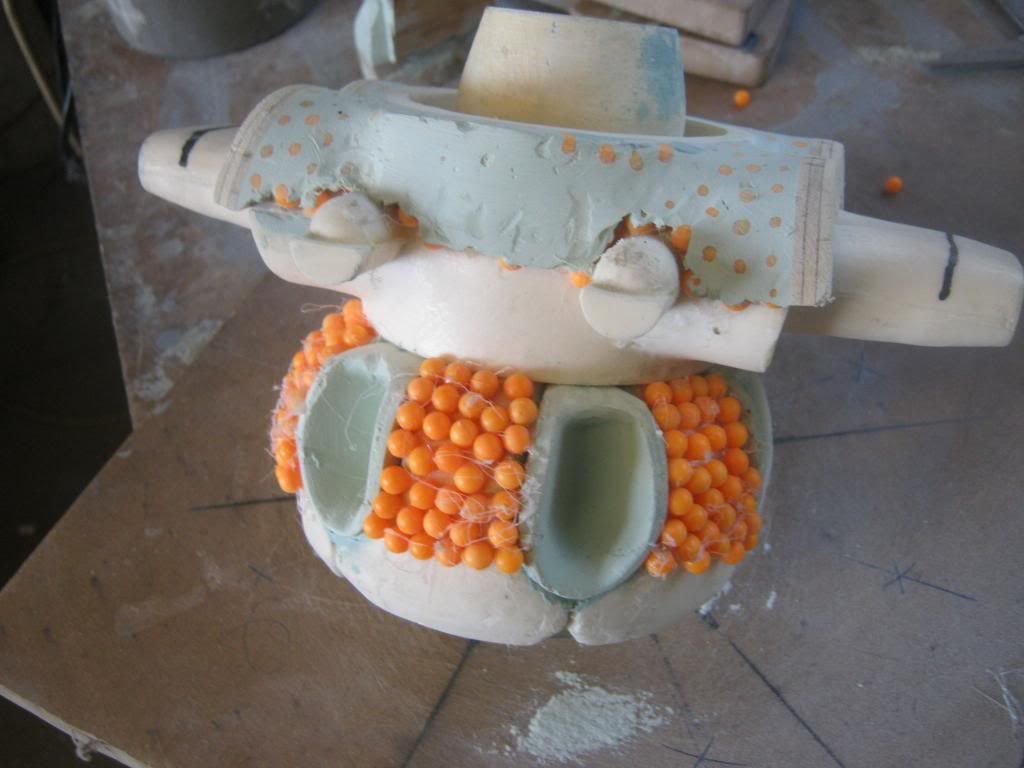
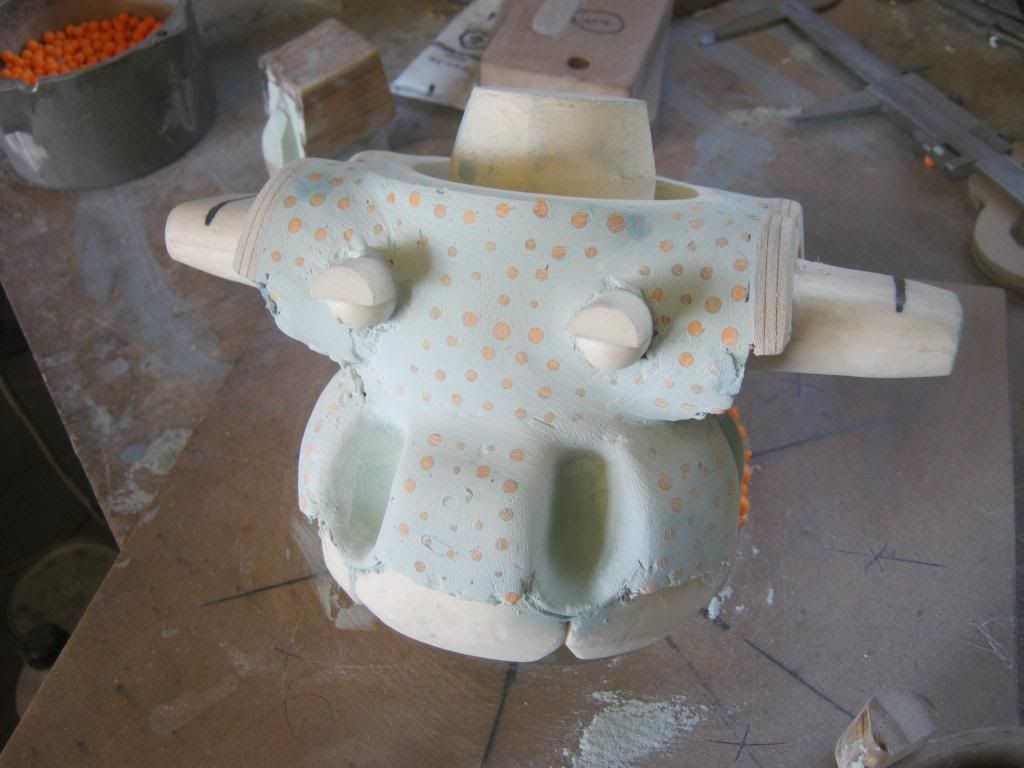
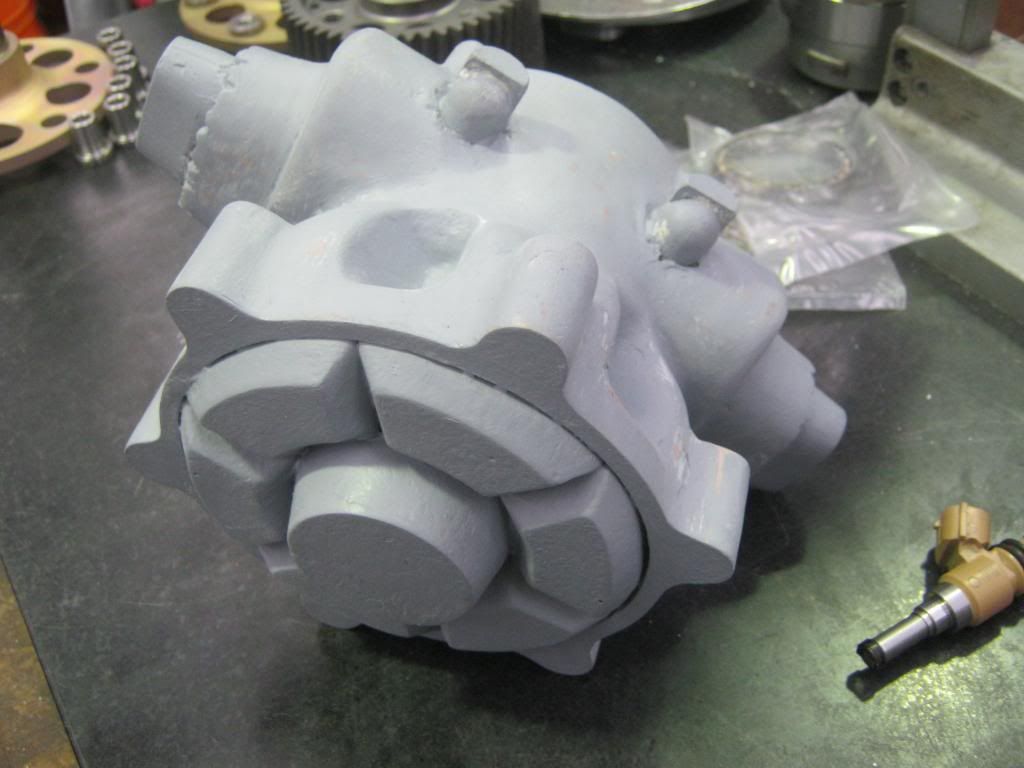
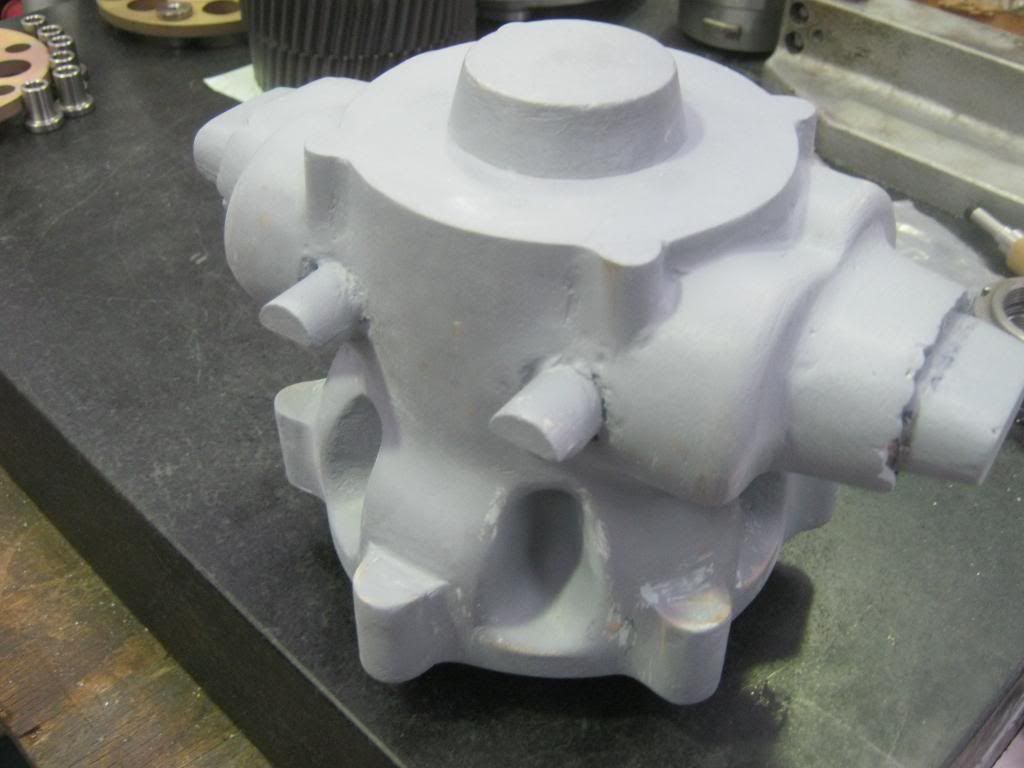
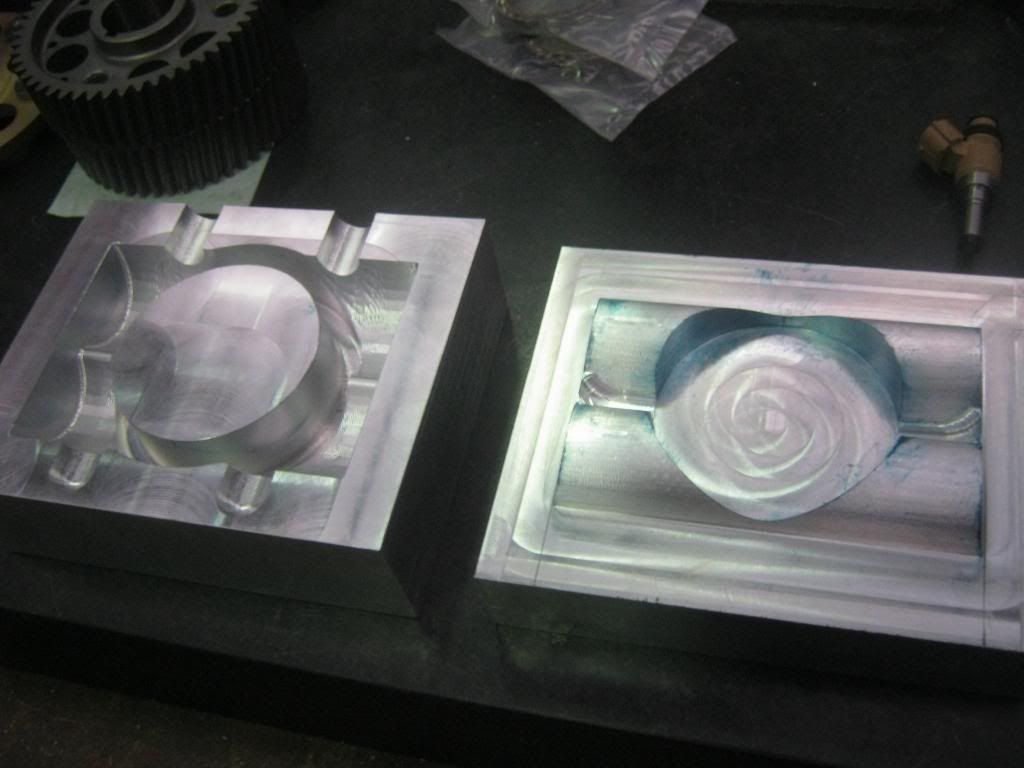
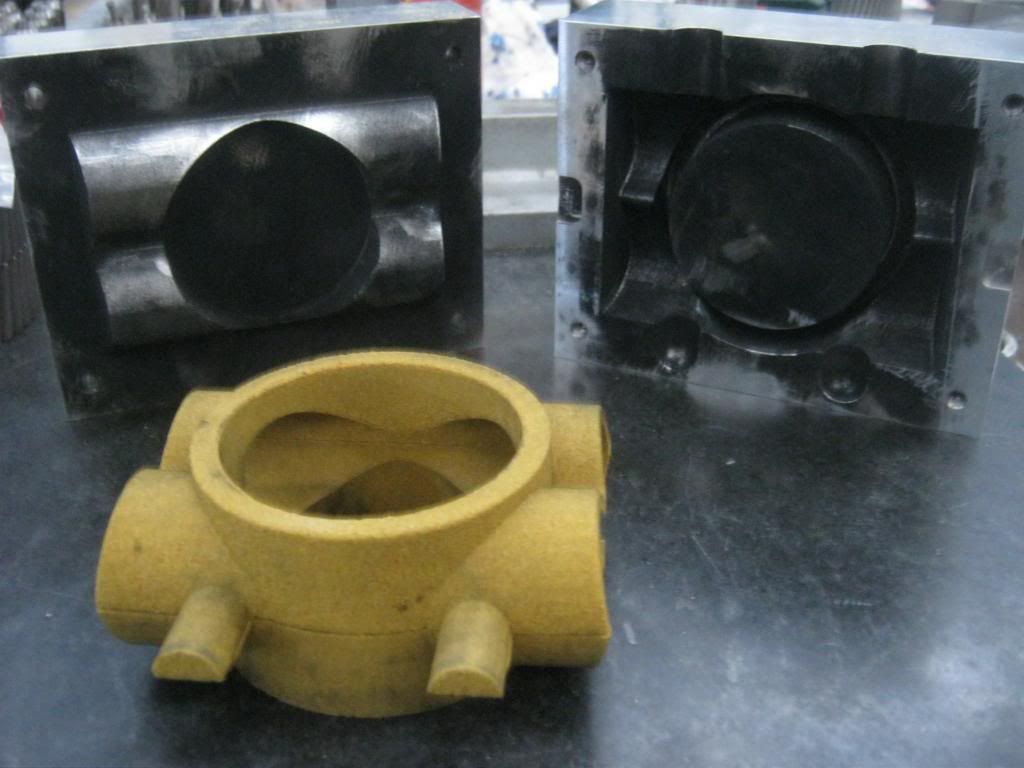
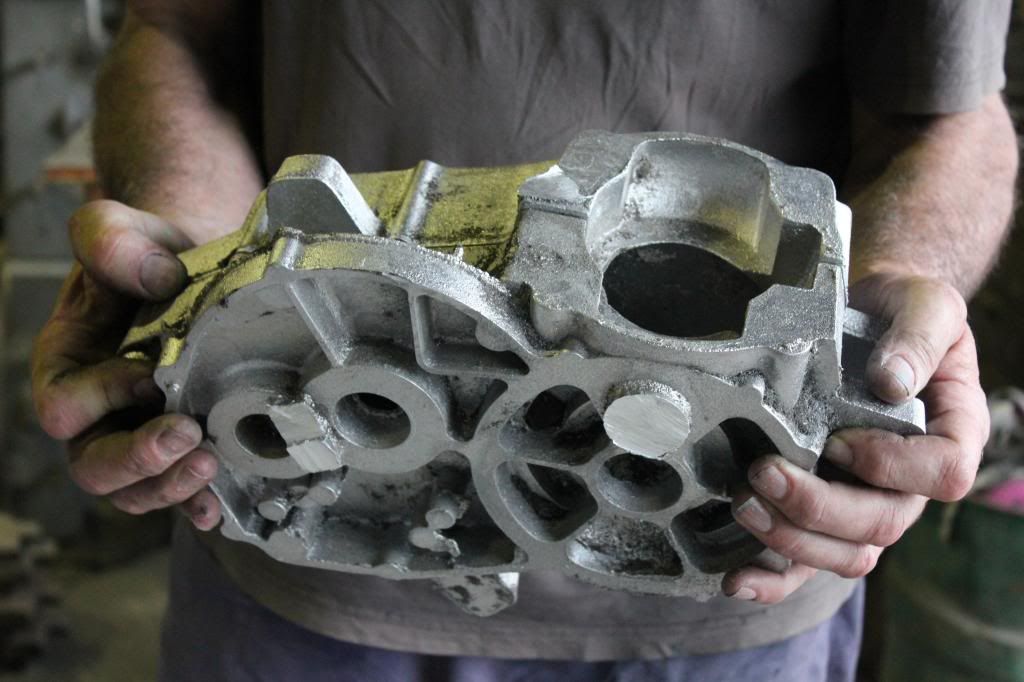
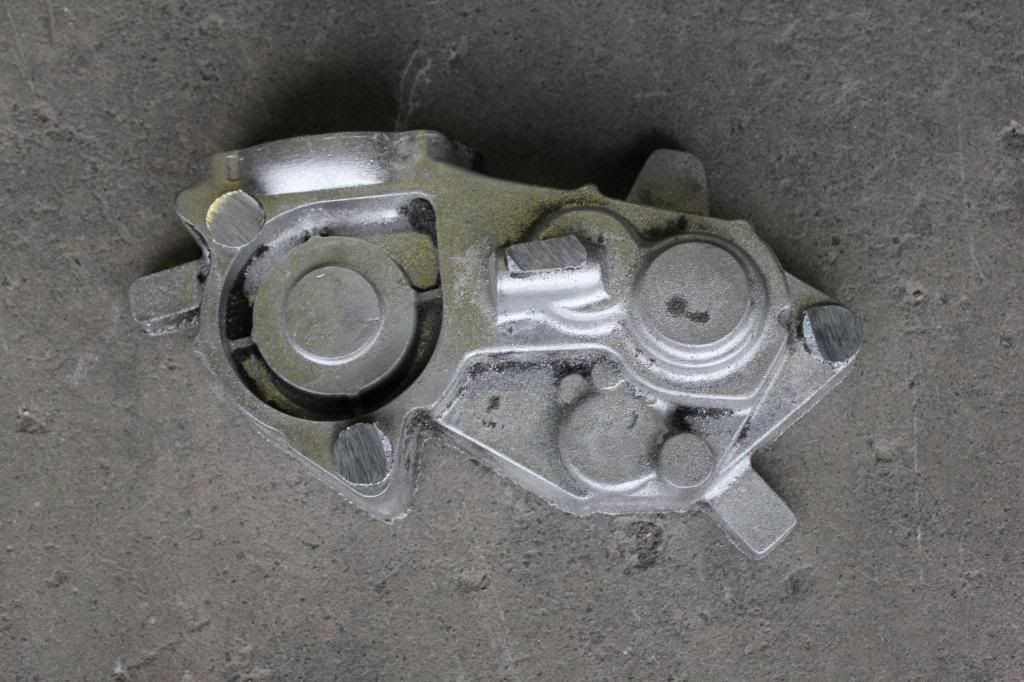
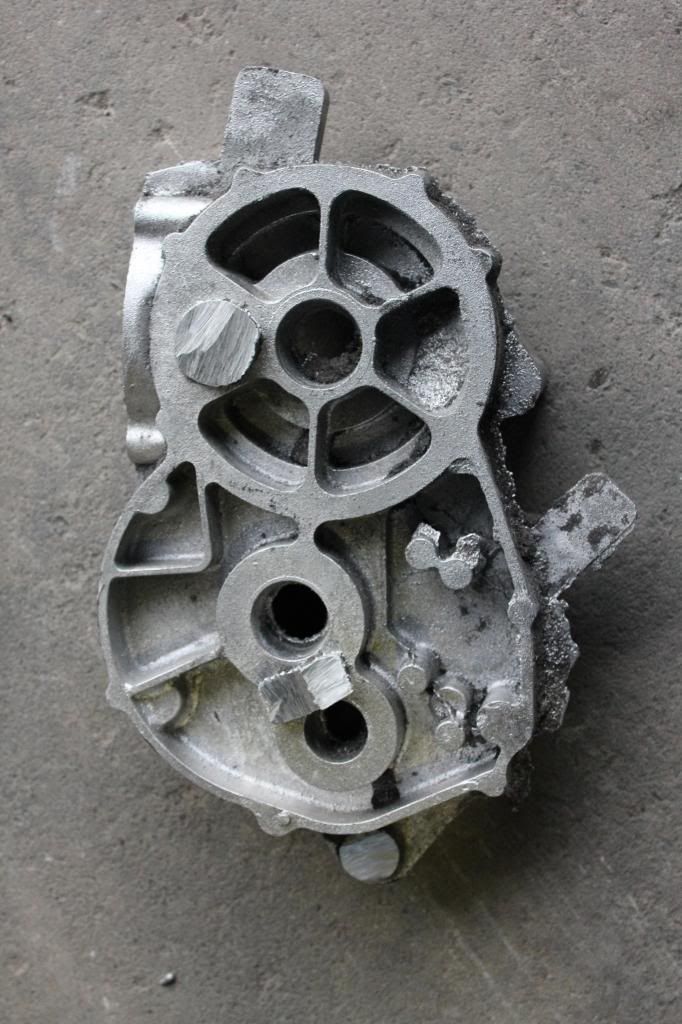
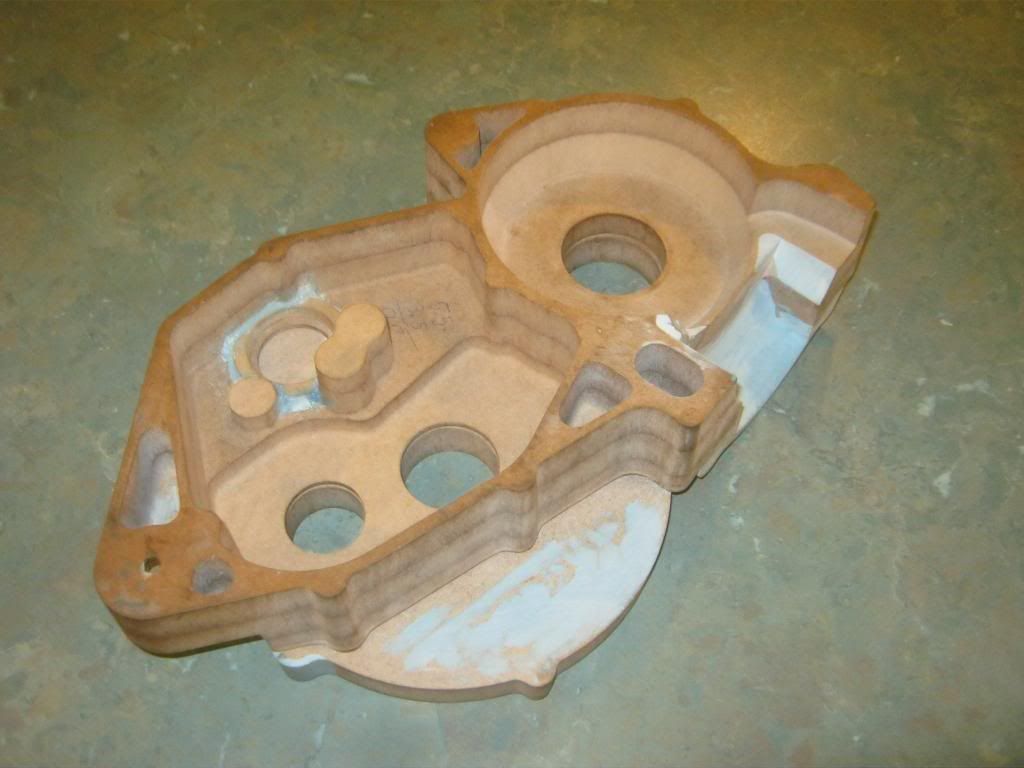
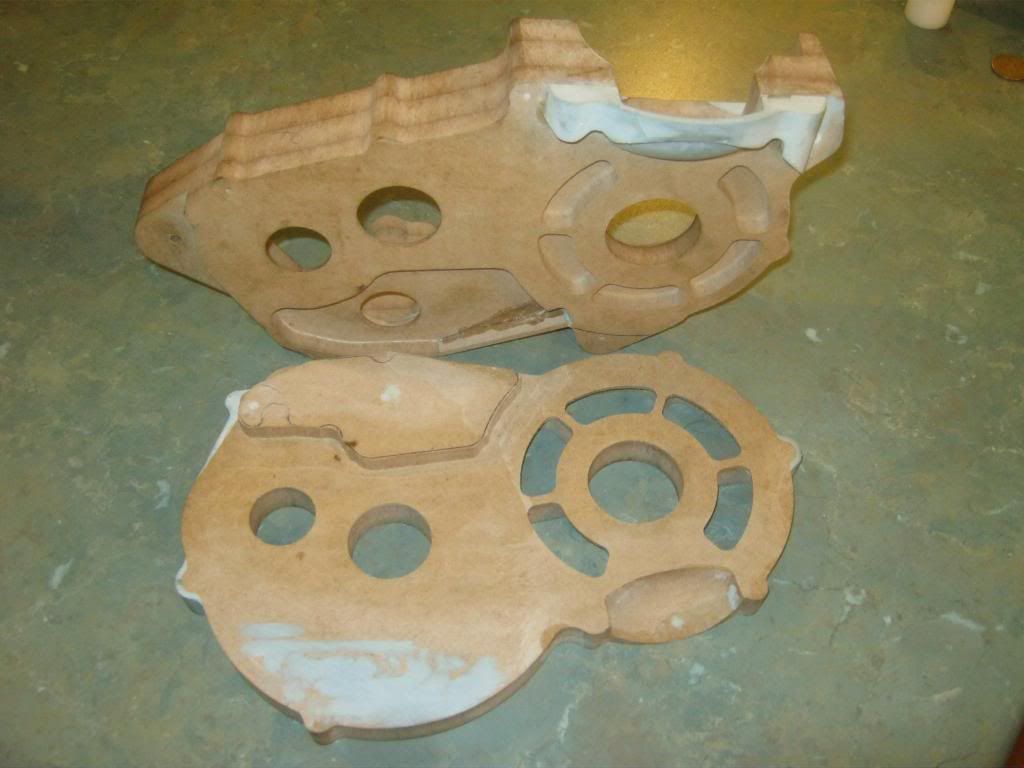
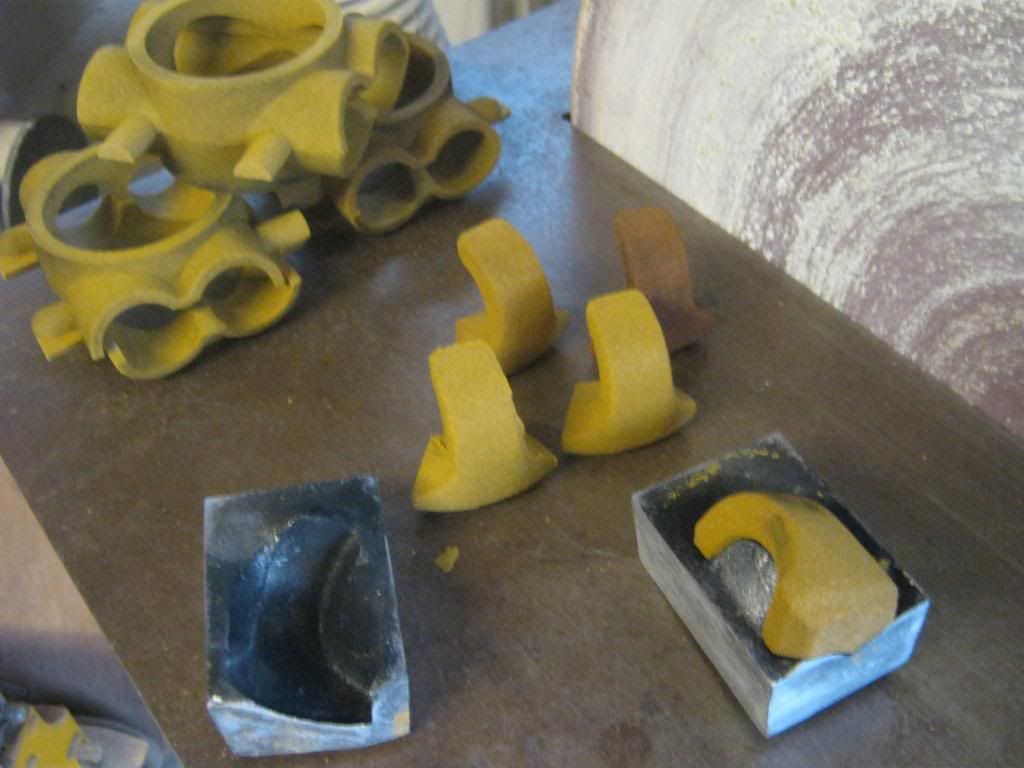
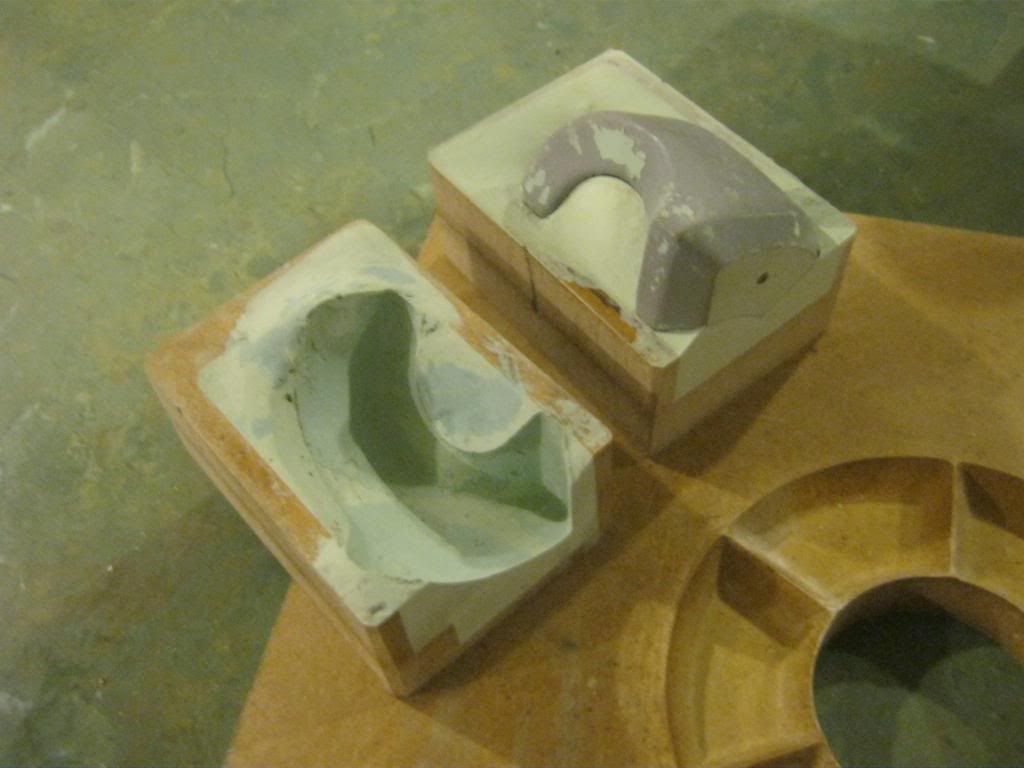
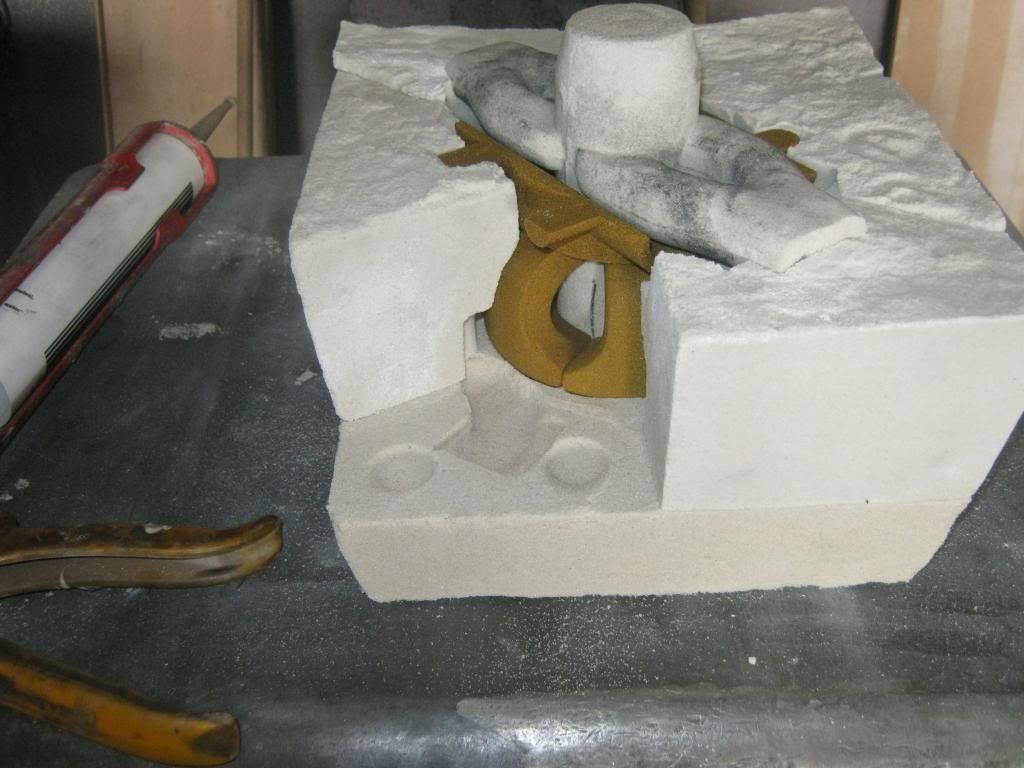
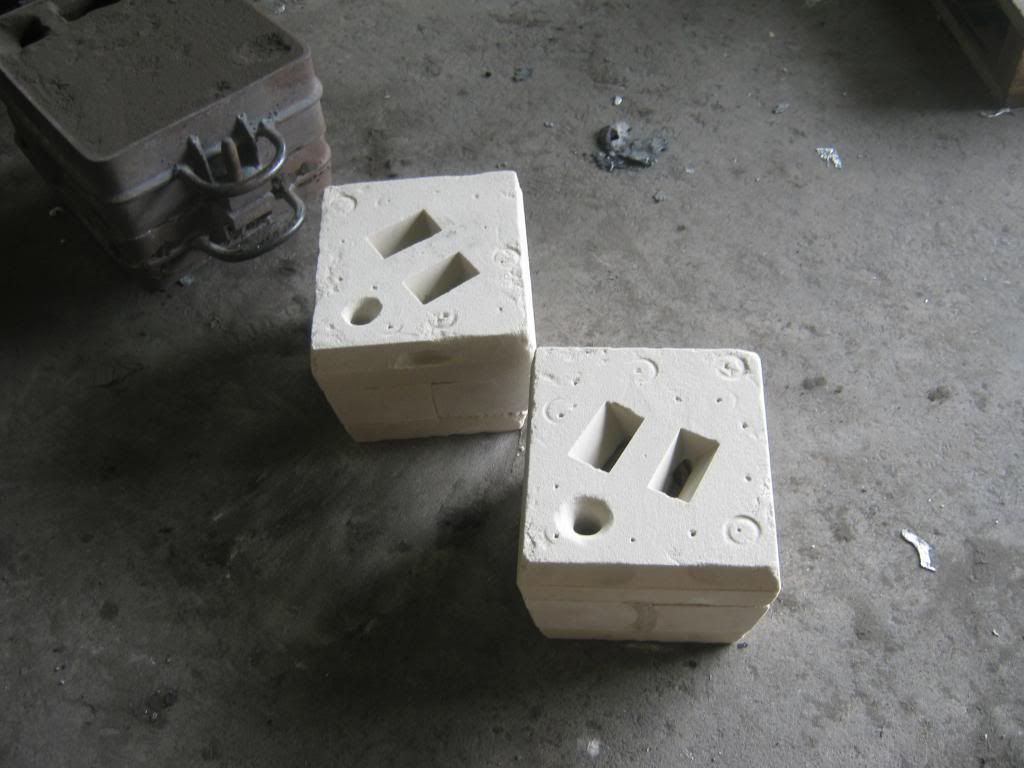
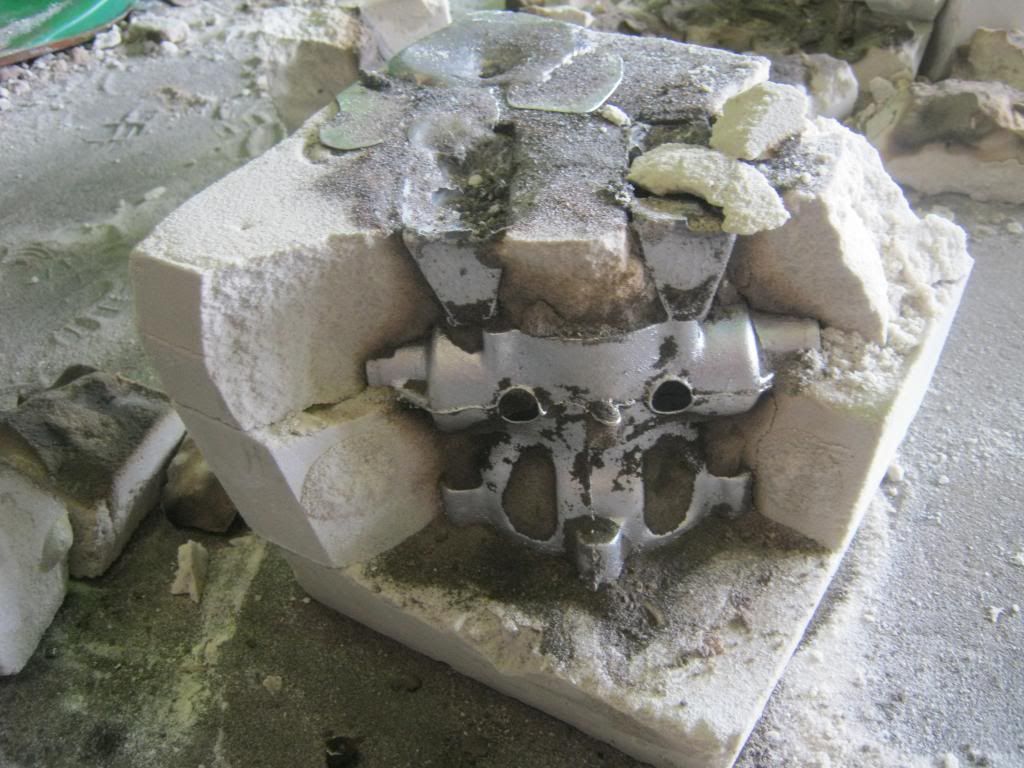
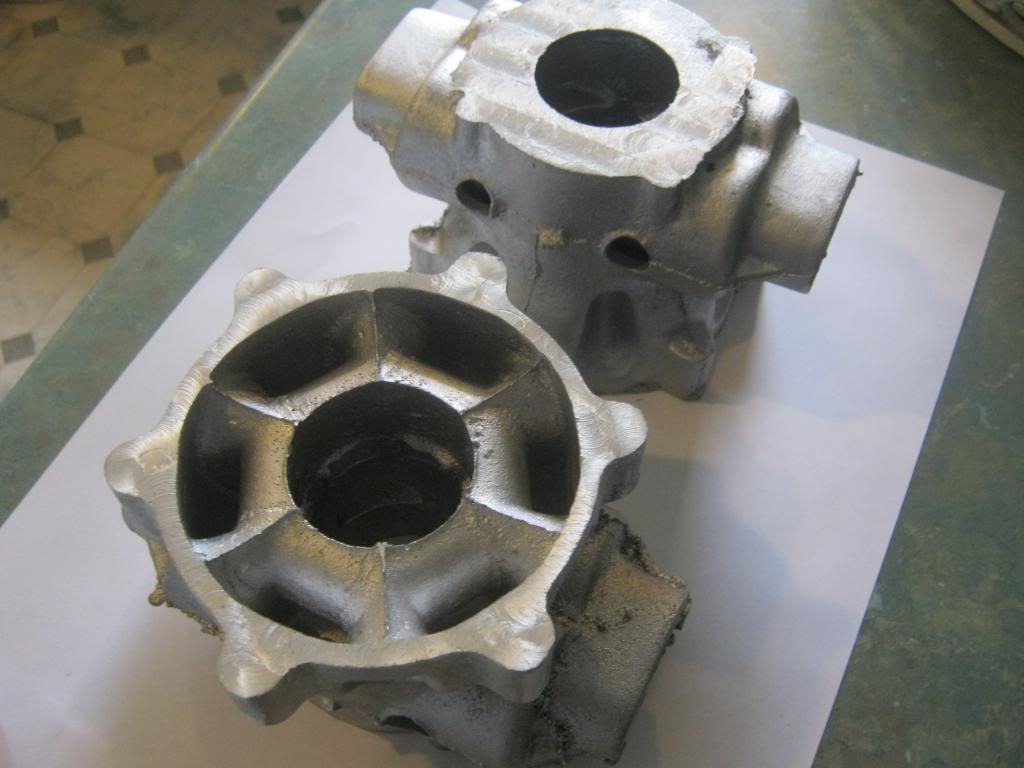
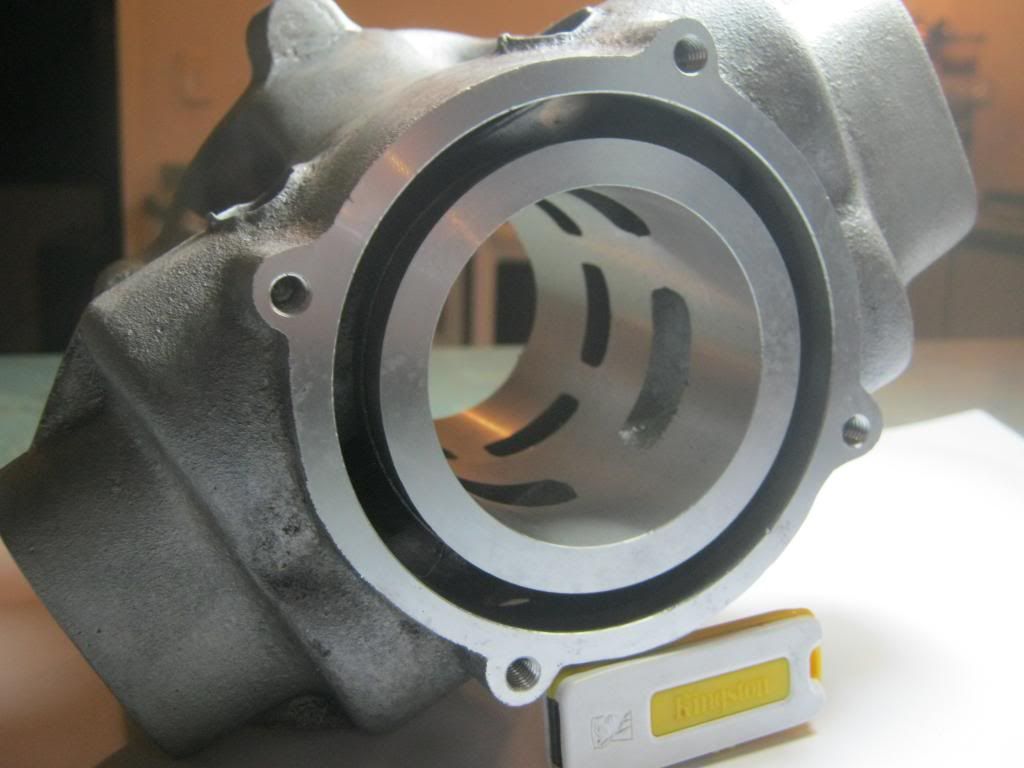
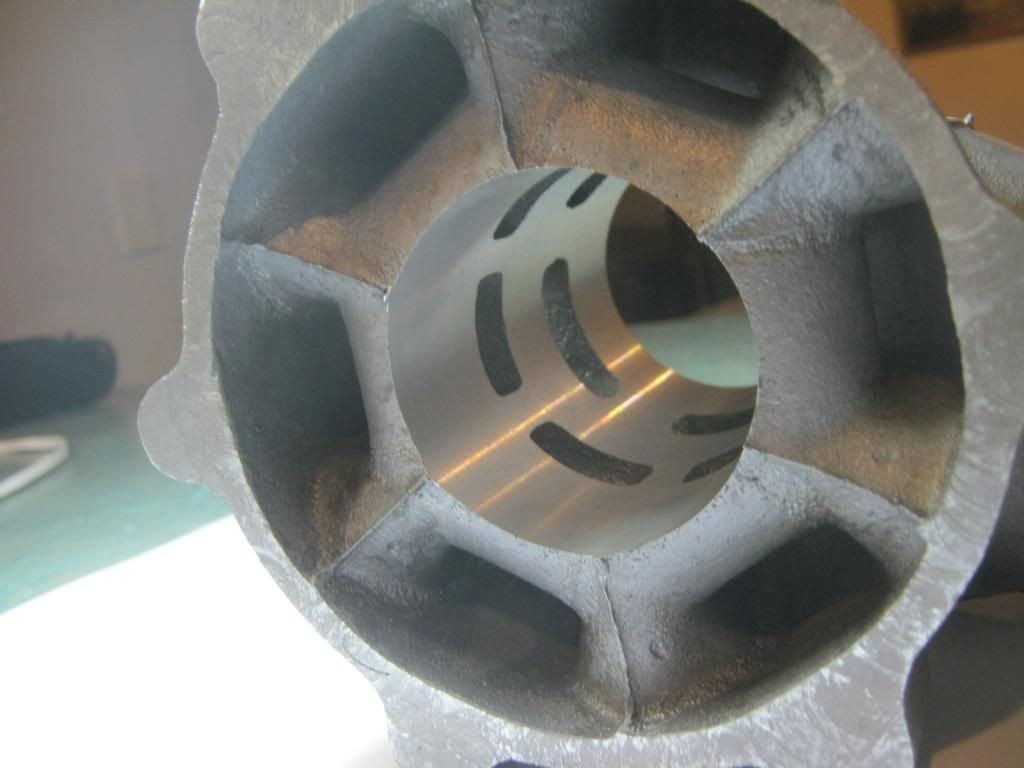
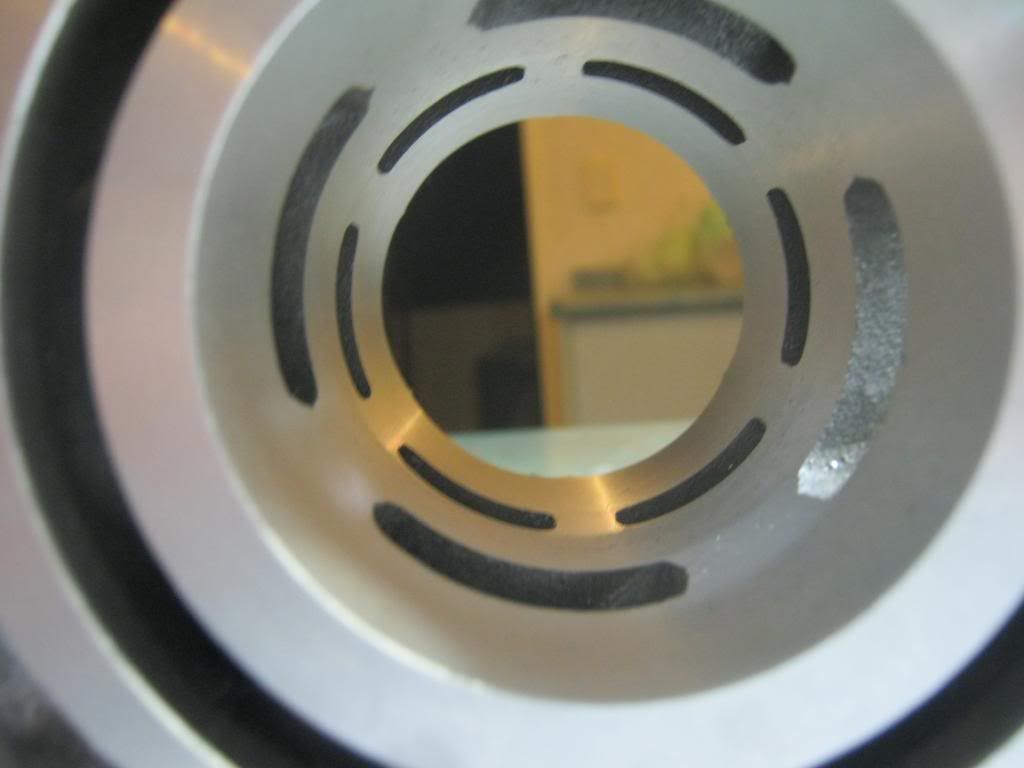
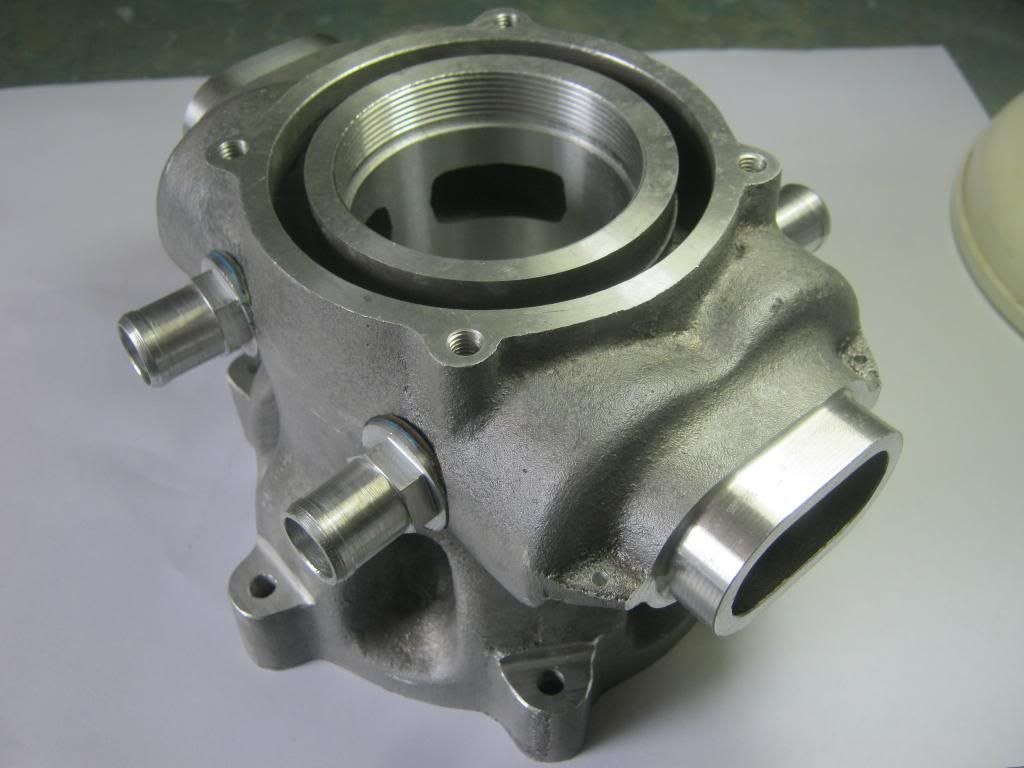
    One of the first things I wanted to do was copy some parts to make moulds from, Husaberg put me onto a product called Vinamold its a rubbery hotmelt that feels a bit like silicone when at room temp but is a runny liquid at 160°C here my first stab at copying the transfers from a RG250 barrell

    Attachment 290811
    How it arrives, I bought 1.5kg its reusable so if you screw up just throw it back into the pot and try again
    Attachment 290812

    Attachment 290813

    Attachment 290814

    Attachment 290815

    Attachment 290810
    left over vinamold ready for next time
    Quote Originally Posted by Yow Ling View Post
    Heres the finished mould of the transfers
    Attachment 290820


    Attachment 290816
    Attachment 290817
    the furnace with the new burner and blower

    Attachment 290818

    Scrap pile with a ingot from the first sucessful melt

    Attachment 290819
    Crucible made from a bit of pipe about 5" diameter
    Quote Originally Posted by Flettner View Post
    Yow Ling, have you lined your crucible with somthing? Ceramic coating? There is a paint on able one. Hot steel straight aginst molten aluminium is not good for the alloy. It does not take much iron to dissolve into the alloy to wreak it. The casting will then not respond to heat treatment. Ok if you are making trinkets but no good if you want sound, high strength engine parts. Also you will need to control your melt temps well, if the alloy is over heated it will burn off some of the alloying components and once again the casting will be left unservicable. Just a few things to concider.
    Quote Originally Posted by Flettner View Post
    The bag of sand ( in the picture ) is the shell moulding sand I talk about. It is suppiled with a resin coating, this bonds to itself at approx 180 degrees C. You will need a metal die for this ( and the wifes oven ). Some of my dies are made using the CNC but some are made by copying the wood / bondifill moulds into aluminium at the foundry, then turning them into dies. This works well although they do need a little cleaning up so the sand core will slide out easily. I have a few pictures, I'll round them up if you like.
    The other stuff in the pictures is the casting resin, for pattern making. It is good because it doesn't shrink or expand as it sets. It uses two equal parts. It is expensive at $380 for what you see here, adding micro ballons makes it go a little further. I have tried other products but at the end of the day this stuff is worth the money!
    Good on you for having a go, I posted these pictures of making a cylinder ( pattern making ) so others might have a go instead of trying to hack out old cylinders to make them what they never were ment to be. Having the ability to cast intricate parts ( cylinders ) changes the way you will approch projects.
    You will need a temp probe, I made one useing a cheap meter I bought using I think type K wire. Put it inside a stainless steel tube with the bare wire sticking out the end. There is quite a bit to melting alloy properly as you will need degassing pills and a flux of some sort.
    After we had the " incident " with our home foundry I decided it was better to be friends with a local foundry and let him melt the alloy for me, I just make the moulds and put them on the floor next to his moulds.
    The white sand you see is CO2 hardening sand ( cold process ), just pack it in then apply CO2 gas and will harden up instantly. This sand is not as strong as the shell hot sand process but it's good for less inticate parts. I'm not sure what is mixed with the sand, Husaburg will know.
    Quote Originally Posted by Flettner View Post


    TZ, the EFI YZ is getting used at trail rides, three now, trouble free.
    Why are there not more EFI twostrokes out there? This bike is a lot of fun to ride. We are experimenting with injection timing changes, interestingly this changes the way the power is delivered.
    So far a 14% fuel saving over my carbed YZ 250. Same track, same times, same rider. This must go to show there is less fuel spillage out the exhaust.

    I am keen to see that ball valve working on your 125. I like the boost bottle idea, best way to beat that restriction so far.
    Quote Originally Posted by Flettner View Post


    Just some random shots of uniflow cores and castings, this one is a 650cc
    The cores are exhaust port and water cooling ( on the exhaust side ).
    Quote Originally Posted by Flettner View Post
    This is a porting tool!


    Quote Originally Posted by Flettner View Post
    [IMG][/IMG]

    First there was this
    Quote Originally Posted by Flettner View Post
    [IMG][/IMG]

    And then this
    Quote Originally Posted by Flettner View Post
    [IMG][/IMG]

    Then after pouring a mould I cut and changed the shape to the curve I wanted
    Quote Originally Posted by Flettner View Post
    [IMG][/IMG]

    Then a female mould made to make more replicas
    Quote Originally Posted by Flettner View Post
    [IMG][/IMG]
    [IMG][/IMG]
    [IMG][/IMG]

    The exhaust core is taking shape.
    Quote Originally Posted by Flettner View Post
    [IMG][/IMG]

    This mould will be the sand core eventually, so this shape will be replicated in hard sand.
    Where you don't want metal, you need sand ( a core ). This is what's called a core box.
    To build a pattern like this you start with the cores first.

    [IMG][/IMG]


    Green stuff is bondi fill, just mix it up and press the part you want to copy into it. MUST wax the male part first.
    White stuff is casting resin, two pot mix. Sets with a faithful size, no shrinkage or expansion.
    Quote Originally Posted by Flettner View Post
    [IMG][/IMG]


    Cylinder mould building is slow, due to lack of time available. I had to change the main core mould to allow for these dimples to be made in the cylinder core. These are needed to fit ( glue ) the transfer cores to. Transfer cores not made yet. Evantually we want a hard sand core that looks like this.


    Quote Originally Posted by Flettner View Post


    The begining of the water core ( master ), this will be the same mould for top and bottom half, sand cores glued together in the mould.
    Core prints need to be added to hold the core in place as the metal is pored. These will end up being the water inlet ports.
    These are what " frost plugs" are on a car engine, not actually for frost, they are there to hold the water jacket sand core in place as the metal is poored around it. Also allows gas to escape as the air in the core expands as the hot metal is surrounding the sand core.
    Orange things are air gun pellets, gives me a standard thickness on curved surfaces.
    Quote Originally Posted by Flettner View Post
    Enter the transfer port master and transfer core box.
    Water core box next, then all will become clear, as to how it all fits together.


    Quote Originally Posted by Flettner View Post
    Right, water core is done.


    And poured a cylinder resin core copy


    copies of the transfer port


    Next I will be building the actual pattern, with these parts inside. Core prints will stick out of the final pattern ( thats all the tapered bits you can see on the ends of everything. It will become clear.

    And all together

    Quote Originally Posted by Flettner View Post


    Starting to build the outside shape, beads and bondi fill. Beads are stuck on with a hot glue gun, real pattern makers don't use a hot glue gun, apparently. Or for that matter, plastic beads.
    Quote Originally Posted by Flettner View Post
    Ok, it was crapy glue anyway. I'm not sure is the real answer. I am concidering a YZ125 as a base but either way I'll need to re make the cases as the transfer port arrangement won't suit. Also I'm not sure anyone has noticed yet but this cylinder is not an FOS type, although it may look like it. There is an extra part I haven't shown yet, see below. Remember it's a uniflow scavange type, with one piston.

    OK now I've shown the missing part, let the "debate" begin.

    [IMG][/IMG]
    Quote Originally Posted by Flettner View Post
    It's a bit of a long shot but I just would like to have a go at testing a sleeve valve unit.
    The piston now will get an easier life with no exhaust to control and no exhaust wash across its edge. Piston can be short as it does not have to cover an exhaust port any more. System total friction will increase but piston to sleeve friction should decrease as they are both moving together ( at different rates ) also nitride is slippery. Material choice for the casting may play a part ( silicon content ) at first I will make it in CC601 just because thats what we use for our gearbox housings. I do have a little LM13 ( 9% silicon I think ) in ingot laying around somewhere, probably in my storage facility ( the old cowshed out the back of the neighbours farm ). Yes if it was such a good idea why has it not been done before ( in small crankcase twostrokes )? I might find the answer to that when we test it, sometimes interesting results pop up that no one predicted. And yes there will be lugs on the side ( transfers ) to fit injectors, perhaps not at the start but if all works well EFI will be the next step.
    The real reason I'm so interested is this engine will not need an expensive nickasil bore, nitriding the sleeve is cheap, bore will just need to be machined aluminium.
    Quote Originally Posted by Flettner View Post
    The beads and bondi fill are spreading.


    Quote Originally Posted by Flettner View Post
    I use something rubbery, yes thats it Husaberg, vimamould that's what it's called. Heat it in a pot to about 170 C then pour into a pre prepared port. I use teflon spray down the port first ( after cleaning the surface ) . Put a slug down the cylinder to stop the rubber flowing out, and lastly insert a coach screw ( or somthing like it ) into the rubber as it sets. There is a lot of shinkage as the rubber solidifies so keep pouring. When cool just pull the rubber port copy out.
    Quote Originally Posted by Flettner View Post
    SVC cylinder is getting close, now the slow finnishing process, painting and sanding. Still have to sort out round the exhaust.


    And around the water core prints, this is where the cooling water will be directed into the cylinder.


    Top four screw lugs are for holding the head water jacket on only, not the head itself.
    Quote Originally Posted by Flettner View Post
    Cheated a bit today, I 3D machined this core box in aluminium. The wood one could be used no problem but I've found that cores , like the water one, that have a lot of exposed surface area to the molten aluminium can cause venting trouble. Cores made in a hot mould ( shell moulding sand ) are far better at venting hot gases out through the core prints and not into the molten aluminium.
    Off to the foundry this weekend but I don't think I'll get this cylinder cast, still needs a few nights of finishing and tidying, I'm just concentrating on the 360 cases. Probably take a day off next week and have crack at it.


    Quote Originally Posted by Flettner View Post
    You should be so lucky, the F9 used to drink 200L drums of ethanol. I think it thought I had my own private still.


    A couple of sand cores from the alloy die. These will be used in the moulding /casting next week.
    Black stuff is carbon from the accetylene tourch, good non stick surface.
    You can see how the core prints ( sticky out bits ) will hold the sand core in position to allow metal to flow around the core. When the metal has solidified the sand bond is destoyed and the sand pours out of the holes left behind by the core prints, leaving a water cooling cavity. You will see.
    Quote Originally Posted by Flettner View Post
    Foundry day was successful, 360 cases cast. Need to tidy them up, send off to get heat treated ( CC601 ) to T6. Casting is to suit YZ 250T gearbox. This is the engine that will have the computer controlled throttle via the rotary valve timing gibb ( slide ). Will run on E85. Cases are water cooled via the cavity behind the RV and under the crank case where the engine mount runs. Reverse cylinder and crank rotation.


    Quote Originally Posted by Flettner View Post


    Patterns milled out on the CNC.
    Reverse is via counter shaft ( gear drive ) also doubles as the ballance shaft.
    Rob, Don't give up, it's the pain we all have to go through.
    Quote Originally Posted by Flettner View Post
    Frits, somtimes a balance shaft is a necessity, I would be frightened to even get off the ground with this engine before the balance shaft was fitted, now I'd be happy to fly all day.

    Quote Originally Posted by Flettner View Post
    Sand cores multipling in Claire's oven, as time permits, during the day when she is at work.
    Copied the bondi fill transfer core box into metal at the foundry this week end, so now I can make hot sand cores. If I was interested in production I would have made a few more metal die copies but I probably will only ever need 12 transfer sand cores? One casting to machine up first and make mistakes on and the second "real" one.


    Quote Originally Posted by Flettner View Post
    Grinding the sleeve, fixture has been made to hold the sleeve evenly all around.

    Quote Originally Posted by GerbilGronk View Post


    This is what happens when Flettner has no freeview.
    Quote Originally Posted by Flettner View Post
    If the sleeve thing doesn't work, we will just lower the exhaust ports and re cast as an FOS cylinder.
    Quote Originally Posted by Flettner View Post
    Off to the foundry tomorrow


    Sleeve with piston. Sleeve ready for nitriding.

    Quote Originally Posted by Flettner View Post
    Foundry day successful.


    From glue, beads and bodifill rubbish, to somthing usefull.
    Quote Originally Posted by Flettner View Post
    All I had time for tonight, four threads on top are not head studs. Both cylinders have been heat treated but I'll only machine one, untill there is a mistake!
    This appears to be a very clean casting, must have had the risers ( feeders ) in the right place.


    Quote Originally Posted by Flettner View Post


    Machining out the 360 cases. CC601 heat treated usualy machines well, shiny and hard.
    Quote Originally Posted by Yow Ling View Post
    I hope the Germans dont steal your IP Flettner !

    Attachment 290928

  11. #26
    Join Date
    4th January 2009 - 21:08
    Bike
    YLR150RR and a RD350LC
    Location
    Not far from Ruapuna
    Posts
    2,368
    Thanks TZ, I still couldn't have done that !
    My neighbours diary says I have boundary issues

  12. #27
    Join Date
    12th March 2010 - 16:56
    Bike
    TT500 F9 Kawasaki EFI
    Location
    Hamilton New Zealand
    Posts
    2,764
    All finished, just need a crank case and head to screw on.


  13. #28
    Join Date
    4th January 2009 - 21:08
    Bike
    YLR150RR and a RD350LC
    Location
    Not far from Ruapuna
    Posts
    2,368
    Very nice, in the time it took you to finish it, I managed to mow the grass, !
    Did you mill the threads in the cylinder , or screwcut them in a lathe?
    My neighbours diary says I have boundary issues

  14. #29
    Join Date
    12th March 2010 - 16:56
    Bike
    TT500 F9 Kawasaki EFI
    Location
    Hamilton New Zealand
    Posts
    2,764
    CNC thread milled, also used the CNC to do the oval exhaust ports, where the chambers will fit.
    I'm not sure what to do about the crank case? I either re manufacture ( copy in casting resin and re cast ) the original 125 cases or copy and change the the drawing of the 360 cases but make them a little smaller and shorter. Not bother with reversing engine rotation and just use the 250 gearbox and clutch. A bit of an over kill but it will then fit straight into the YZ250F frame I have lined up for these experimental engines. Also if it did in fact produce some power the bigger gearbox would not cause trouble. I would just use case reed as it's simple and quick ( for now ). I thought I might get into it today but still seem to have a lot of customers jobs hanging around that need to be finished before Christmas!

  15. #30
    Join Date
    12th March 2010 - 16:56
    Bike
    TT500 F9 Kawasaki EFI
    Location
    Hamilton New Zealand
    Posts
    2,764

Thread Information

Users Browsing this Thread

There are currently 2 users browsing this thread. (0 members and 2 guests)

Posting Permissions

  • You may not post new threads
  • You may not post replies
  • You may not post attachments
  • You may not edit your posts
  •