


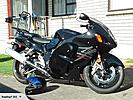
I bought a busa for longer trips as a sport tourer. It's not a particularly aggressive set-up but I was finding my wrists were sore after 4+ hours on the bike.
LSL handlebar conversion would probably be the most comfortable choice for longer rides but you will need a new front brake line & clutch line. I did not like the look on the busa..... form over function matters. I considered risers (Genmar 1 1/4" for example ) which are a cheaper option but they don't really look good on the busa unless you drop the front end and they are only a one trick pony.
I ordered Helibars directly from Helibars which took 10 days to arrive and cost an additional 40 USD for shipping. On the busa they are 1 5/8" taller, 1/2" rearward facing and 1/2" wider. Might not sound like much but it's quite noticeable when on the bike. They also look like stock bars on the Busa. I'm happy with them and would purchase again if I buy another sports Tourer.
In the box was two nicely machined & powder coated bars (left & right) and basic instructions on installing them + the normal US litigation avoidance BS that only a qualified motorcycle mechanic should install them.
Right side install quick & easy, remove bar end, remove switch box + throttle assembly housing, remove the brake leaver + master assembly, couple of bolts holding the bar in place and slip in the right helibar. Instructions say you do not need to fully spit the switch box. I did split the switch box housing and disconnected the brake light connection. It was easier to push the bar though the throttle assembly & get the bar in. Wire harness was long enough as was the throttle cables and brake line.
Left side, bar end, switch block housing, and clutch leaver + assembly and remove the two bolts holding the bar in pace. I split the switch block housing again it seemed easer than try and feed the bar though the switch assembly. The wiring harness & clutch lines where long enough. You also need to swap over the handgrip on this side. I used an air compressor for this. The instructions suggest using a screw driver and rubbing alcohol to get the grip off. Don't know how difficult that would be and glad I did not have to try it. Think I would probably have just bough a new grip and been done with it had I not had the compressor.
Finally checked lock to lock and pulled a small amount (~ 1/2") of additional wire harness to get a bit more slack and job done.
I like the change, it feels different first time out. It's better, noticeably less presser on my wrists, better setup for longer rides, not perfect but much better.
Tools required:
Basic hand tools
Air compressor
1/4" torque wrench (1-20 LBF/FT, all bolts were < 10LBF/FT)
Thread locker (blue, Med strength)
Hand grip bond

 Reply With Quote


Bookmarks