We got quite a lot of 3XVs here nice looking bike. At least one is a local bucket. Used to be quite cheap a few years back, a couple of mates had SP's Not so much now. TZ racers would use the cases as backup engine bassis.

 No8 Wire Extraordinaire

We got quite a lot of 3XVs here nice looking bike. At least one is a local bucket. Used to be quite cheap a few years back, a couple of mates had SP's Not so much now. TZ racers would use the cases as backup engine bassis.
Don't you look at my accountant.
He's the only one I've got.
Forum whore
Talked with a very interesting guy the other day who was very knowledgeable and helpful. Richard has a business supplying specialty items for the classic two stroke racers and road bikes, a great range of very useful stuff can be found on his site.
https://www.accu-products.com/
After seeing how easily a Honda RS125 rider started his bike on our dyno with one of Richard's starter tools. Team ESE just had to invest in a couple of them and a bunch of spare starter nuts for their race bikes, we can't wait to get them, they should be here in a few days.
I had not seen them before but these starter tools are so easy to use I just had to tell you about them.
Lots of other useful things on the Accu-Products site, well worth poking around to see what would be helpful for your own race bike.
Forum whore

That's right. The friction of a crankshaft in a couple of V-block is far too high for good balancing. But add a couple of discs and you're in business.Originally Posted by koenich


Forum whore
Last time I was in Italy at the Pavesi factory i bought these off them.
The use of large diameter wheels makes the bearing friction torque virtually nothing.
Great idea to copy for Adegnes.
Ive got a thing thats unique and new.To prove it I'll have the last laugh on you.Cause instead of one head I got two.And you know two heads are better than one.
Hardcore Biker

Maybe discs from an old hard-drive could be used.
I'll look into it in the future.
https://youtu.be/apTo-yho0YI
Forum whore
When will you be back?

Hardcore Biker
I'm back and I'll tell you it's not pretty, man! Don't go there!
Highway Biker

Everything electric?
Hardcore Biker
well im still trying to get this ktm head sorted out. made the first cut and the squish band angle was way off. thought the piston dome was 17* but i was wrong. made another cut about 15.5* and its still to steep so ill try to figure it out on paper before anymore cuts. i wont be able to cut the radius in the head band to match the piston but should i try to get close to a paralell / slightly diverging toward bore center squish gap ?
Pristine Knee Sliders

You probably can match the squish to the piston dome.
It sounds like you have a lathe, and it probably has a swiveling toolpost, locked in place by grubscrews or a handle. Once you identify the exact radius of the piston dome, you can set the tip of the tool to be slightly less than that radius from the centre of the toolpost swivel. I say slightly less, because you want to avoid a negative squish angle (=deto), so the squish band radius needs to be a little tighter to produce a positive (diverging) or neutral squish angle.
Then with the grubscrews or handle loosened, you just swivel the toolpost assembly back and forth by hand, taking tiny cuts (since it won't be mechanically controlled). Works a treat.
Hardest part is identifying the exact centre of the toolpost pivot. Piston dome radius can also be tough to determine as some aren't a pure spherical cap.
Obviously this technique won't be feasible if the dome radius is more than about 100mm.
L-Plate Rider
To find the radius of the piston crown I believe this will work - assuming it is part of a sphere,
1) make a tube with accurately known height and inside diameter.
2) place it on the piston and measure the height of piston protruding into the tube (see image)
using h for the protruding height and d for the inside diameter of the tube the piston crown radius can be found from
(h^2 +d^2) / 2h
Mick

Hardcore Biker
Last page, finally got here after months (only 1605 pages and 24000 posts read)
My complements to All the contributors, over the 8 years, SO MUCH great information.
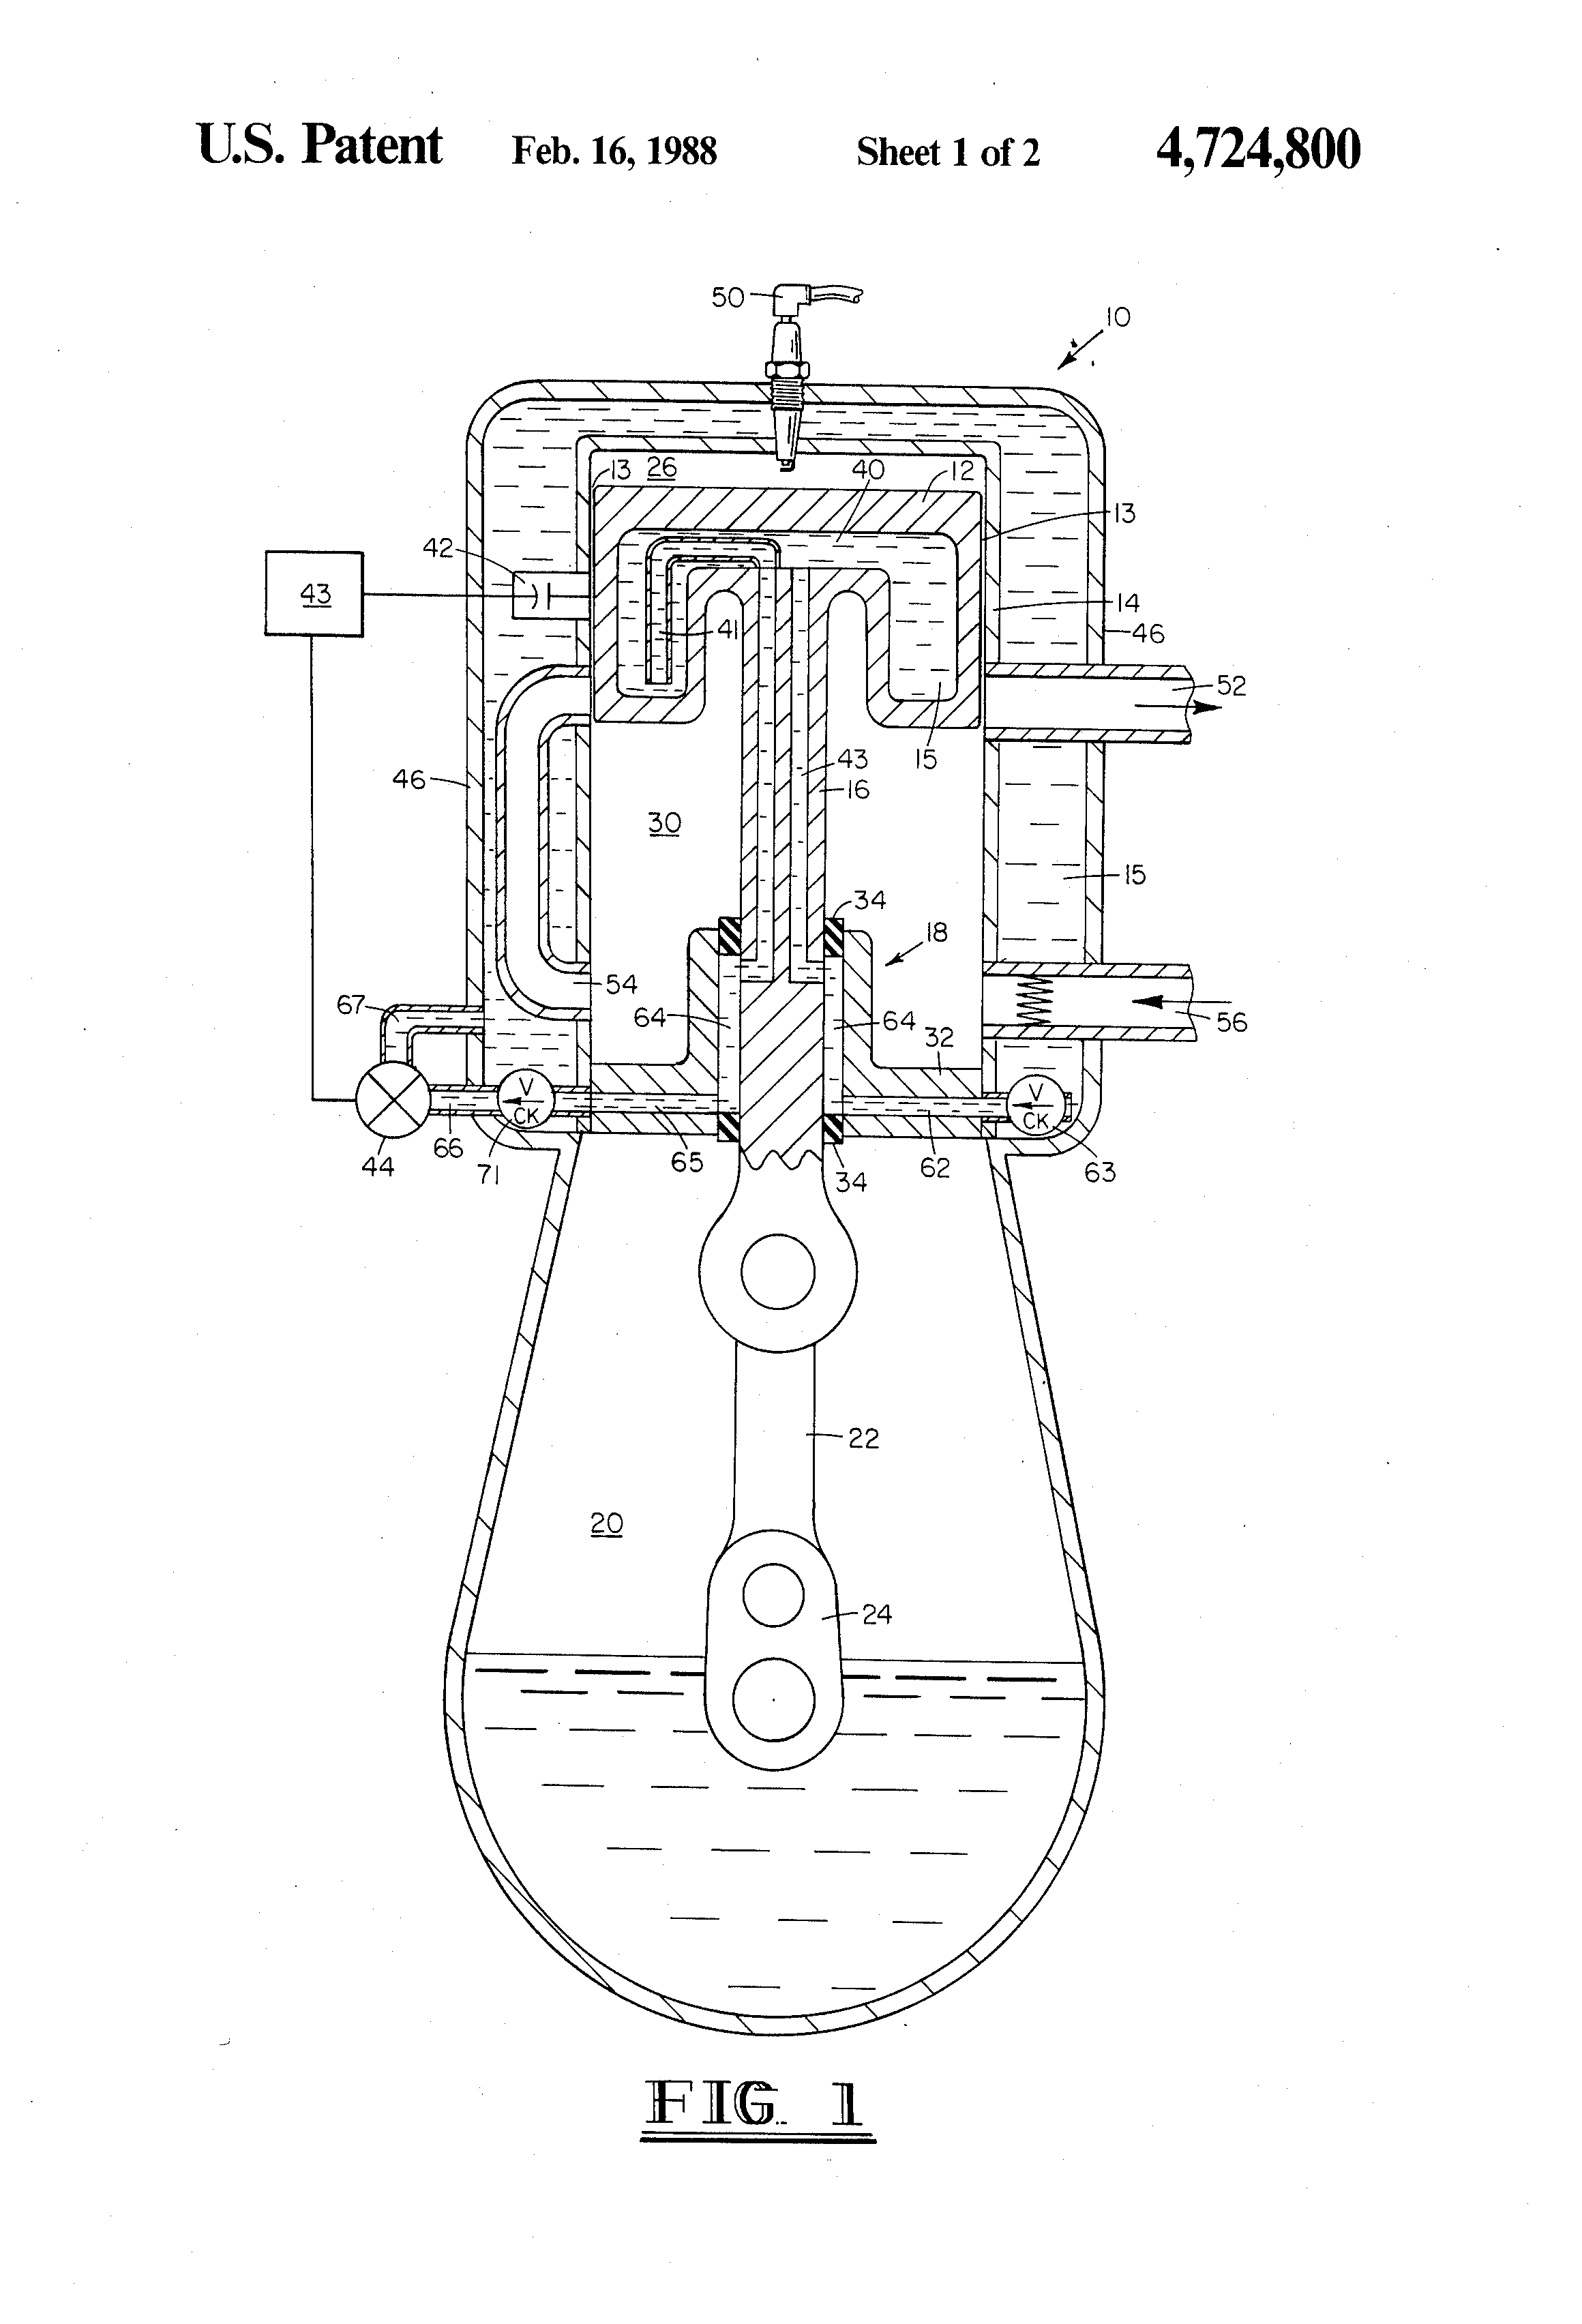
Here is a pic from an old patent that seems to contain some relevant elements of a Ryger style engine.
A bit more Bleed down STA is required.
The internal piston cooling might need to go, definitely rev limiting and not KISSable.
And it should have a 24/7 flap valve in the inlet to the transfer chamber.
Cheers, Daryl.
"First they tell you you're wrong, and they can prove it.
Then they tell you you're right, but it's not important.
Then they tell you it is important, but they knew it all along."
Charles Kettering.
Pristine Knee Sliders
A cylinder like the one the piston sits in, is a good tube to use.
The formula I've been using is :
(4*(h^2) + (d^2)) / (8*h)
Yours is a lot simpler and gives very different results. Are you sure it's correct?
L-Plate Rider
I believe your formula is exactly the same except the top and bottom of your formula are both multiplied by 4. Dividing both the top and bottom by 4 gives 2h on the bottom so both formulae should give the same answer.
Scooter boy

My first post here, so I would like to thank everyone on this thread. I've been blown away by the generosity and cooperation of you guys. This is the best thing I've read in years.
There are currently 27 users browsing this thread. (0 members and 27 guests)
 Posting Permissions

 Reply With Quote
Bookmarks